Adventures in Knitting! – Flat Knit Socks

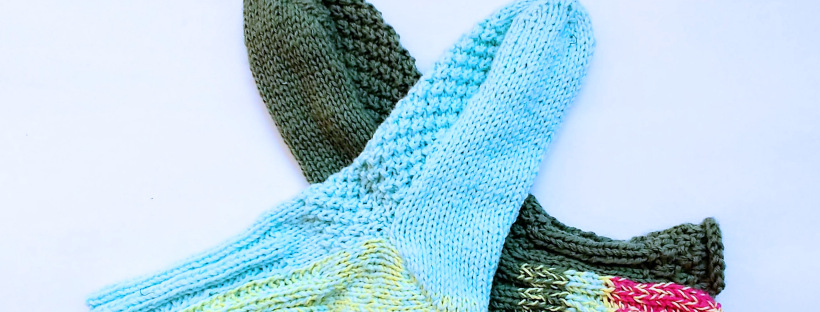
Two Knit Socks - Blue and Green

I know what you’re wondering…

Did Elaine get snowed in at some point during the past few weeks?

Why, yes. Yes I did.

I have lived in snowy places before, but I have never in my life seen as much snow as I have the past few weeks.

It just kept snowin’…

Three foot long icicles hung from the roof, and I was knee deep in snow for more than a week. It was super crazy!

But also kind of fun. There was something really nice about knowing that everyone in the surrounding areas got to spend some extra time with their families for a few days.

Good news though! The weather finally cleared, the snow finally melted (well, mostly… there’s still some piles of it here and there) and I have finished my socks!

Nothing says snowed in like flat knit socks. They are pretty easy to knit, and I had to knit them flat because I lacked the size 7 double pointed needles that I needed to knit them in the round. (Unfortunately, those double pointed needles don’t just appear in the snow like Turkish Delights do in Narnia…)

Oddly enough, the hardest part came when I had to seam them together. I couldn’t get the socks to fit together properly for a while. Finally after using the seamless mattress stitch to seam them together for the 3rd time was I able to get a sock-like shape.

I still have to block the socks (wash them gently and shape them flat for drying) but that’s a project for the weekend I think.

I found the pattern for flat knit socks online. Admittedly, they don’t match and they are slightly different patterns as well.

Back of Socks - Blue and Green


This is for a fun reason!

I managed to reuse a green swatch I was knitting for the top of one of the socks when I realized that I had accidentally cast on the exact number of stitches in the swatch that I needed for the socks, therefore saving myself 4-6 hours of work. I just ripped out some of the extra stitches to make the swatch shorter (and the right length for the top of the sock), and then started knitting the decreases for the toe.

I could have made matching socks by making green and pale robin’s egg blue stripes, but it would have made for a pretty unattractive color combination. Plus, when I made them my feet were freezing. I made these socks to wear under my tall boots, so it didn’t matter to me that the colors matched so much as long as the socks were warm.

Two Knitted Socks - Blue and Green

I’ve got a ball of pink worsted merino yarn and a ball of yellow cotton yarn left. I started making a pink hat about a week ago. I had bought some circular needles a few weeks ago in anticipation of making the hat but (being a new knitter) didn’t realize that you couldn’t make a hat on 29 inch circular needles because all of the extra cord gets in the way of knitting.

Of course, this was yet again a day that the local knitting store was closed, and I wanted to start my hat! So again to the kitchen I went to grab some more takeout chopsticks. I wish I would have figured out that I could make the double pointed needles before I made the socks, but it was probably good that I learned to knit them flat first. I could focus on learning to increase and decrease stitches and not have to worry about knitting in the round.

It took me about 2 hours to shave down, sharpen, sand and polish 4 double pointed bamboo knitting needles (size 7 of course). I had to keep sharpening my craft knife using fine sandpaper (thank you YouTube for teaching me how to do this) to cut the bamboo properly, but making my own knitting needles was actually a really fun process. All I needed was chopsticks, sandpaper, a buffing block and a craft knife.

There’s something very satisfying in knowing that you needed something, and then you made it yourself. I also loved the process of doing a simple carving project and knowing that my effort created something useful, something that will help me create more things in the future.

And my double pointed needles work just fine, the yarn slides smoothly across them. I started to knit with them and after knitting about 3 inches of hat I realized that the hat pattern that I was using was way too small for my head. The hat was about 19 inches in diameter, too small for anyone but a child, so I ripped the stitches out and rolled the yarn back onto the ball.

I think that I’m going to try and knit a more complicated hat pattern. I saw one with cables and an Irish Moss pattern that I love, but I’m going to try and make it with a different style of cable.

I also learned how to do basic cables!

Pink Cable Knitting


Here’s my pretty swatch in bubblegum pink merino. My goal for this year was to be able to knit a cable and I seem to have accomplished that 10 months early. I will have to find a bigger knitting goal for this year now. Yay!

What was your first knitting project?

And if you have any advice for a new knitter it would be greatly welcome. I’ve got so much to learn and I am super excited to keep making things.

If only nice wool was cheaper…

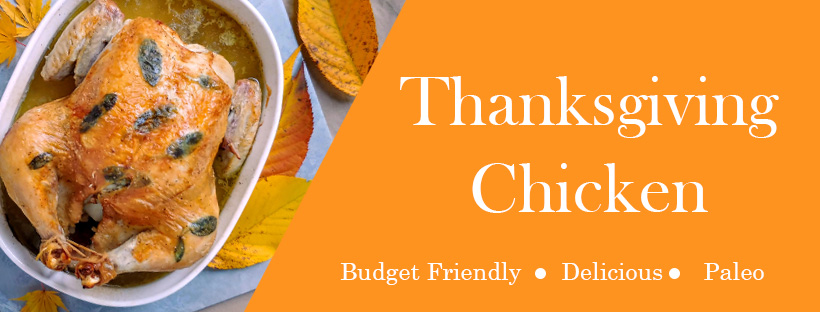
Thanksgiving Chicken

clone tag: 1738347936203128812

I love Thanksgiving! It’s one of my favorite holidays of the year.

Friends, family, good food. What’s not to love?

One funny thing about Thanksgiving in my family is that I’m the only one that really loves turkey. Everyone else prefers chicken.

But that actually works out ok (even on Thanksgiving)! Most of the turkeys at the local supermarket are really big 20 lb birds, which is way too much turkey for our family to finish, so a 4-5 lb chicken is the perfect size for us. With all the side dishes and desserts (cornbread dressing, mashed potatoes, pumpkin tarts, apple tarts, and pecan tarts), everyone ends up very happy and full by the end of Thanksgiving dinner.

Also, those turkeys are expensive. Even if you buy a conventionally raised turkey, a 20 lb turkey is going to be about $50. This chicken was $8, and it was free-range and organic to boot.

How did I get a free-range organic chicken for $8? I just bought it on the sell by date and it was marked 50% off.

The grocery store also sold a little packet of mixed fresh herbs (thyme, sage, and rosemary) for $2.50, that plus an onion and some frozen celery (that I had stashed in the freezer from about a month ago) meant that this beautiful roast chicken added up to about $11-$12 for 4-6 servings. Much more affordable than $50.

And if you’re far from home this Thanksgiving, and you’re making dinner for two, you can make this chicken and have some great leftovers to pack for lunch.

Some great things about this recipe are that it still has all those rich flavors that we associate with a Thanksgiving turkey, AND you don’t even need to make a gravy! You can spoon the rich pan juices from this chicken over mashed potatoes and cornbread dressing to your heart’s content. It will be just as delicious as any gravy, (with less work) promise.

clone tag: 2934890611313498100

Sprigs of rosemary and thyme flavor the chicken from the inside out, and I tuck sage leaves under the skin for some color and extra flavor. The most delicious parts of that chicken are right under those leaves, so make sure to get some chicken with a sage leaf or two!

Thanksgiving Chicken

Makes 4-6 delicious servings

Ingredients

4 lb chicken


1/2 an onion (cut into 4 wedges)

2 sprigs of thyme

2 4 inch sprigs of rosemary

8 inch stalk of celery (cut into 1/2 inch slices)


2 1/2 tbsp olive oil

9-10 fresh sage leaves

sea salt

black pepper


1 cup of water


Instructions

1. Preheat the oven to 425 degrees F.

2. Wash your herbs, measure out the olive oil and water, and cut up your onion and celery and set all of this aside onto a separate plate along with some salt and pepper and a few toothpicks.

3. Whether or not your wash your chicken is completely up to you. There’s some controversy about if you should do it or not.

Personally, I do wash chicken before cooking it. I fill a big bowl of water in the sink and submerge the chicken, then pour out the water (this way the water doesn’t splash off the chicken). I do this a few times until the water runs clear. The chicken then goes into your roasting dish (I’m using a 12 inch oval CorningWare casserole dish) and the big bowl goes straight into the dishwasher.

Once the chicken goes into the oven, I sanitize the sink and any surfaces that the raw chicken may have touched.

clone tag: 4547346532438281968

4. Dry the chicken off with a paper towel. Put the onion wedges, thyme, rosemary, and celery inside the chicken and tie the legs together with some kitchen twine.

Gently separate the chicken skin from the chicken breast and tuck the sage leaves around under the skin. If the skin tears, don’t worry about it. The chicken will still be golden brown and amazing! Just use a few toothpicks to arrange the chicken skin back into place.

Rub the skin with olive oil, sprinkle over salt and pepper, and tuck in the wingtips using a few toothpicks to hold them in place while the chicken is roasting.

Pour the water into the bottom of the baking dish.

clone tag: 3141653108858848348


5. Roast the chicken for 50 min – 1 hr 15 minutes, or until the chicken is golden brown and a thermometer measures 165F in the thickest part of the thigh.


clone tag: -7849446987528649024

Look at that crispy skin! Yum.

Let the chicken rest 10-20 minutes before carving. Pull out the toothpicks and serve the chicken with the delicious pan juices.

clone tag: 708306459663070278

Ta-da! You just made a glorious roast chicken for Thanksgiving!

One more thing – this chicken still has a little magic left.

After dinner, pull the meat off the bones stash it in the fridge for later. Put the carcass with all the herbs and vegetables still inside of it into a slow cooker with a splash of apple cider vinegar and fill the pot with water (I cut off the kitchen twine before I put the bones into the slow cooker but I’m not sure if it’s really necessary). Turn the heat to low and cook for 24-48 hours.

Strain out the solids, and you will be left with an incredible and flavorful bone broth!

Add in some of your leftover chicken along with some vegetables and you will have a beautiful soup to warm you up on a cold day.

Wishing you and your family a very Happy Thanksgiving!

Elaine

My Society6 Shop Designs

Hi Friends! I know I’ve been a little quiet on the blog lately, but there’s a good reason for that.

I opened my society6 shop a few weeks ago, and I’ve been working on some exciting new things to share with you! I’ve been designing all sorts of fun things and I hope that you will like them as much as I do.

5% of anything that I make from Society 6 sales will be donated to a girls education charity ($1 from each sale in my Etsy shop will be donated as well).

Since it’s back to school season, let’s start with the backpacks first!

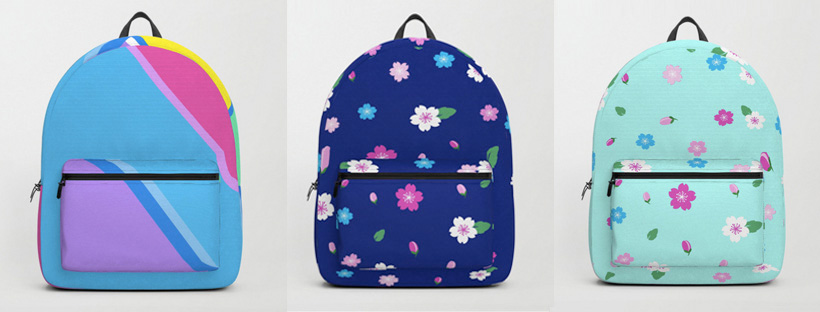
Backpacks are an essential item for going back to school and these are some of the backpacks that I designed. I wanted them to be really fun and make you happy when you look at them (because school isn’t always easy) and hopefully having a fun backpack can bring a little brightness to any school day.

Each backpack is a unisex size, has a padded back and bottom, and has an interior pocket that fits up to a 15 inch laptop. I would loved to have any of these backpacks when I was a student and heading back to school.


I also designed some fun tote bags – these are great to keep folded in your purse or backpack for grocery shopping.


These are the awesome leggings that I designed! It still kind of amazes me that someone can wear something that I dreamed up. The teal design is in the color scheme “Unicorns Frolic, ” (which I thought was such a sweet and cheerful name). I designed the pattern so that it would be flattering on a lot of different shapes and be bold and eye catching. I can totally see myself running around in any of these leggings, as well as exercising, or relaxing at home in them. Leggings are an all occasion item, and these are sleek enough to wear just about anywhere.


I’ve got a few tops that are available in the shop, and I’ll be adding more soon. I wanted the shirts to look chic and modern and look great on everyone.


This is super neat! I’ve added furniture to my shop recently as well! There are coffee tables, credenzas, benches and side tables in the shop, and many of them allow you to choose between black or gold hardware so that it’s easy to match your existing furniture or design scheme.


Last, but not least are my favorite items in the shop – the duffle bags!

duffle Screen Shot 2018-08-09 at 1.18.14 AM

When I was working out the color scheme and patterns I was thinking of what I would want to take with me to the airport. I love duffle bags because you can use them for your work out gear in everyday life, or fold them into your luggage when you go on a trip and fill them up with souvenirs or gifts to bring back for your friends and family.

The duffle bags come in a few different sizes. The two here are in the design “Cherry Blossom Garden” in Deep Blue and Blush Pink shades.

Screen Shot 2018-09-09 at 6.55.32 PM

So cute!

You can find more items I designed here.

Thanks so much for looking! I’ll be back with more recipes and DIYs soon.

I hope that you have a great week!

Elaine


P.S. Which one is your favorite item?


The Etsy Shop is here!

one small blog

I’m so excited to share that the Hope and Butterflies Etsy Shop is now open!

Starting new adventures and not knowing where they will take you

When I started this blog, I had no idea where it was going to go. I knew that I loved to cook, and that I wanted to share my recipes because they were the kind of recipes that I wanted to have when I first went on a dairy / gluten / refined sugar free diet.

I had so many food sensitivities, and I missed eating the things that I loved.  It was really hard to be in more pain, or just feel ill because I ate something as normal as a blueberry muffin. My list of food sensitivities was so extensive that I couldn’t even eat most of the recipes on other gluten free websites.

So I started writing recipes, and eating gluten free versions of the foods that I loved again.

What I didn’t expect when I began this journey was that as my list of recipes grew, and as I cooked and ate my way through this rough patch, I felt more and more like myself again.

Not having recipes that worked for me meant that (for a while) the foods that I ate were boring and bland, and eating those foods brought me no joy.

I hadn’t realized how much brightness food had brought to my life before, and learning to eat the new versions of my favorite foods gave me that brightness back, and nourished not only my body, but also my spirit.

Baking and cooking have always felt very meditative to me. When I’m in the kitchen I can get lost in a recipe, and no matter what I’m going through, I always feel better (and like I’ve accomplished something) when I’ve created and eaten something delicious (especially if it’s a muffin or a brownie).

That’s what I wanted to share when I started this blog, to help other people with food sensitivities find a way to nourish their souls with the joy of creating something that they really enjoy eating.

What has also been exciting is to see how many people have visited the blog. Hope and Butterflies has had visitors from places like the UK, Australia, India, France, Ireland, Kenya, The Netherlands, Germany, and even our friendly neighbor to the north, Canada.

It feels amazing to think that this little cooking blog that I started 6 months ago would reach (and hopefully help) so many people in so many places all around our big world.

I’m also incredibly lucky to have so many good friends and family who have cheered me on during this time. So many people in my life have reached out to tell me that they enjoy reading the blog, or think it’s cool that I’m writing it, which has been amazing.

There have been many times when I think I’m out of ideas and am in doubt if I should keep trying to write recipes, and their encouragement has really cheered me on. I’m so glad that I kept writing, and I’m excited to see how the blog grows and evolves in the future.

The Prints

wonder wander comes + goes

The Hope and Butterflies Etsy Shop sells posters / prints that you can download and print at home.

Each shop listing includes 7 high resolution JPG files (300 dpi, RBG Color Format)

– 4″ x 6″
– 5″ x 7″
– 8″ x 10″
– 11″ x 14″
– 18″ x 24″
– 24″ x 36″
– Wallet Size (the size of a credit card)

Most importantly though, $1 from each sale will be donated to support girls education.
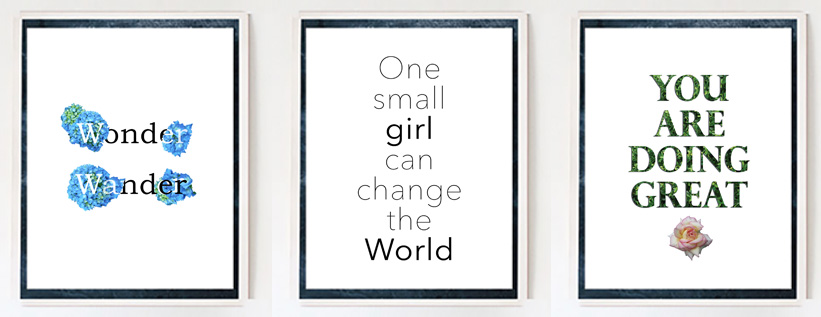
When I was designing, I wanted to create prints that would be encouraging, and most of all, kind. Many of the designs encourage self care, self acceptance, and cheer you on in difficult moments.

Life can be really hard sometimes, and you’re always doing the best that you can.

Sometimes it’s nice to have a reminder of that, which is why the prints all include a wallet size printing option as well.

Because sometimes you do need a pocket sized reminder that “You are AMAZING” when things aren’t quite going the way that you want them to. Take it from someone who knows, storms pass, you will grow from them, and things will get better.

And whoever you are, you matter too. Your dreams matter too.

I hope that in some small way, these prints will cheer you on when you start down the path towards your own dreams (even if you have no idea where it will take you).

Starting the blog was scary, but also exciting and so so rewarding. I wish you that same scary excitement (and fun surprises, and joy!) along your journey.

Girls Education

Right now, this little Etsy Shop and the Hope and Butterflies Blog are my dream.

I decided to donate part of the proceeds from each sale to support girls education, because not only is it simply the right thing to do, but also because I want to do what I can to help other young women and girls accomplish their own dreams.

I was lucky enough to be able to go to school and learn about the world around me.

Every young woman should have the right to do the same. This shop is my own little way of trying to help make that happen.

Thanks for reading. I’ll be posting more recipes soon.

And remember :


you are doing great blog

And you are wonderful, just as you are.

And Happy Mother’s Day to all the amazing moms out there!