The Very Best Gluten Free Pancakes – Oat Flour, Vegan and Egg Free Friendly, Dairy Free

P1090017

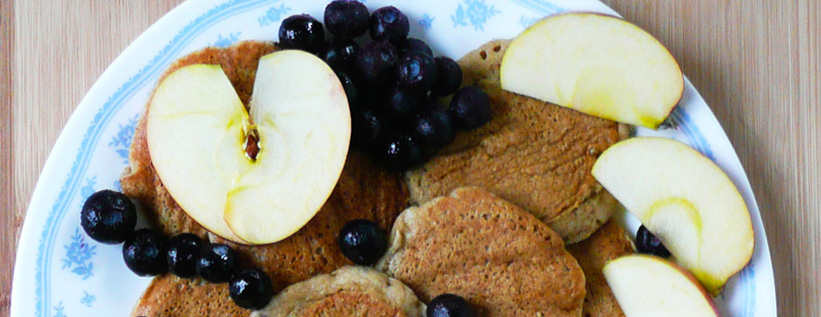
(These are the vegan pancakes, made with maple syrup)

When I first started on this gluten-free, food sensitivity journey, I found out that I couldn’t tolerate many of the ingredients in store bought gluten-free flour mixes.

And I missed pancakes.

pancake perfected
I missed eating them with maple syrup, and fresh peaches in the summer time. I missed eating them them with strawberries and blueberries. Pancakes are a very nostalgic and American food, and it really felt like I was missing out by not being able to eat them.

It took me a year and a half to get this pancake recipe perfect, but I’m honestly so glad that I kept at it until I figured it out. These pancakes are wonderful! They are slightly crispy on the outside, and pillowy soft on the inside. They are not gummy at all.

pancake stack cropped- corner fixed

They are made from simple ingredients, and cost very little to make.

The first time I finally figured out this recipe, I flipped over the first pancake and my heart skipped a beat when I saw how beautiful and golden that little pancake was. I had finally gotten it right, and it was so exciting!

P1070032 corner fixed

(The non-gummy cross section of the pancakes).

They are perfectly sweet, so you don’t absolutely need to drizzle over more maple syrup when you serve them, but you can of course! Especially if you like your pancakes extra sweet.

They are pretty hearty little pancakes and very filling. Each batch serves about 2 people. I have been known to make extras, and then eat them out of the fridge cold when I was too tired to think of something else to eat.

They work great for this! Especially after a long day if you’re being tempted by the siren call of those cookies you stashed away in the cupboard from your pre-gluten free days. You can eat these instead, and not feel ill afterwards.

You can pack a few of them in a little Tupperware container with some berries (fresh or frozen is fine) for breakfast. They heat up well in a toaster oven as well.


The Very Best Gluten-Free Oat flour Pancakes

Makes 10 pancakes (about 2 servings)

Ingredients

200 gm oat flour – or about 2 1/4 cup + 3.5 tbsp by volume *

scant ½ tsp of baking soda

tiny pinch of salt


1/4 cup of maple syrup

1/4 cup tbsp of melted coconut oil

2 eggs **

½ cup of water

1.5 tbsp of apple cider vinegar


Instructions

1. Sift together the oat flour, baking soda and salt.

2. In a separate bowl stir together the water, maple syrup, vinegar, eggs and the melted coconut oil.

3. Pour the wet mix into the dry, and stir this altogether until pretty smooth. Set this mixture to the side, and set a timer for 15 minutes.

During this time, make your stainless steel pan non-stick.

4. When there’s about 3 minutes left on the timer, start to heat up your pan.

If medium heat on your burner is a 5, set the heat to 4. You want to be just a little lower than medium heat.

5. When the timer goes off, give your batter a good stir (no gluten means not having to worry about over-mixing this batter).

Spoon 2 tbsp of pancake batter onto your pan for each pancake, and use the back of your spoon to gently spread the batter into a little circle, just to smooth out the shape of your pancake.

Cook the pancakes 1 min to 1.5 minutes on the first side until you see small bubbles forming on the surface of the pancake, and the sides have firmed up.

Flip the pancakes over and cook another 20-30 seconds until they are a pale golden brown, then stack the pancakes on a plate to the side. I usually cook 2 pancakes at a time so that I have room to flip them (I cook them in a 10 inch skillet). If the pancakes start to brown too fast, turn your heat down a little and cook them for a shorter amount of time on the first side.

The batter should be a little on the thick side so that the pancakes cook up nice and fluffy.

If you like thinner pancakes, you can add about 1-2 tbsp of water to the mix to thin it out. If the batter is too thin, stir in a little oat flour to thicken the batter up again.

If you use 2 tbsp of batter per pancake, then they end up about 4 inches in diameter. You can make the pancakes larger by using more batter, and adjusting the cooking time.


pancake duo closeup

(Adult Pancake – 2 tbsp batter, and Baby Pancake – 1 tbsp batter).

* Notes – Ideally you would weigh out the oat flour, but measuring it by cups and tablespoons will work in a pinch.

Costco sells organic maple syrup for $12 – $13 / liter. The oats I grind myself in a blender (wearing earplugs, because it can be noisy). Don’t use a food processor to grind the oats, because it won’t be able to grind the flour fine enough. I put any extra oat flour into an airtight container and use it for other recipes.

** Substitutions – you can sub white vinegar for apple cider vinegar, and any neutral flavored oil for the coconut oil. You can also swap out a few tablespoons of maple syrup for water if you want them less sweet. The maple syrup just gives the pancakes a mild sweetness and a nice brown pancake color.

***Egg-free and Vegan versions – This pancake recipe is the gift that keeps on giving. It continues to amaze me every time I eat them, and make them with or without eggs.

To make them egg-free, just swap out the eggs for an extra 1/4 cup of water per egg. The texture isn’t quite as fluffy as when you use the egg, but definitely still respectable, and much better than when I tried to use a banana to bind the pancakes instead.

I’ve also made a version where I swapped out the maple syrup for 4 tbsp of honey, and used an extra 1/2 cup of water instead of the 2 eggs. They were very good as well, and the honey also acts a little as a binder.

If you make the pancakes egg free, use 1 tbsp of batter for each pancake instead. Making the pancakes smaller makes it easier for them to cook through, and you’ll get a better texture than if you made them larger. I was very surprised at how beautiful the honey egg free pancakes were that I made today. They were a beautiful light golden brown when I flipped them over, and I was happily shocked that it worked as well as it did.


I served the honey ones today with a little jam that I made from just cooking down some frozen peaches, blackberries, blueberries and a dash of maple syrup over medium heat until thickened. It was so good!


two pancakes perfected

It’s amazing how much joy a pancake recipe can bring. However you make these pancakes, I hope that you enjoy them and get to share them with someone that you love.

Let me know how the recipe works out for you.

Happy Eating!

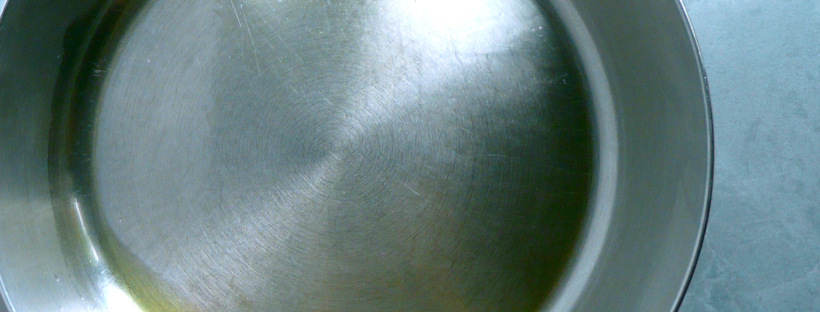
stainless steel pan

How to Make a Stainless Steel Pan Non-stick (non-toxic)

stainless steel pan 1

(This is what the pan looks like before the coating of oil).

When I decided to stop using non-stick cookware, one of the hardest thing to get my head around was how I was going to be able to cook things like pancakes and sunny-side up eggs.

I googled “how to make a stainless steel pan non-stick” and wasn’t able to find an answer.

So after much trial and error, I finally figured it out. And it’s actually super simple to do.

By heating the oil in a pan this way, the oil binds to the surface of the steel (forming a polymer – whatever that means…), creating a temporary non-stick coating. I’ve used this method with olive oil, coconut oil, and avocado various times and all have worked great.

Instructions

1. Start with a cool stainless steel pan. Rub the bottom of the inside of the pan with probably about ½ tsp (maybe less) of olive oil with either your fingertips or a paper towel. You only need a thin layer, but want to coat the entire bottom of the pan so that there are no gaps in where you put the oil.

2. This can get a little smelly so, I’d turn on the cooking fan for this.

Put the pan onto a cold burner and turn the heat up to medium. Hover your hand a few inches above the pan. When the air over the pan feels about as warm as a warm bath you’d give a baby (so not too hot) then turn the burner off, and leave the pan to cool on the burner while you prep your veggies for your stir-fry, or your pancake batter.

3. Then just cook as usual.

The non-stick coating is temporary, but you should be able to get through cooking a batch of pancakes, or fry a few eggs on this surface just fine before you need to add a little more oil.

When you’re done cooking, you can scrub this non-stick surface off with some baking soda mixed into a paste with a little dish soap and a scrubby sponge. When I need a non-stick surface next time, I just repeat the process.

stainless steel pan 2

(This is what the pan looks like after it’s been heated with the oil).

For me, I cook on an electric stove, and I’ve done this enough times now that I know that if I start with a cold pan, it takes 5 minutes to heat to the baby bath level of warmth. Now I can just rub the pan’s surface in oil, put it onto the burner, turn on the stove, turn on the fan, and set a timer for 5 minutes.

You may have to adjust the timer for your stove, as you may find that your stove heats up more quickly or more slowly than mine does.

I always stay in the kitchen as I do this, just in case the pan starts to smoke.

If you see the pan start to smoke, pull the pan off the hot burner right away (also turn off the burner) and put the pan on one of the cold burners to cool. Once cool, it should still have created a non-stick surface and you can just cook on this pan as usual.

If you fry an egg sunny side upon this surface, I’d cover the pan with a plate or a lid while the egg is cooking. The egg white cooks through more evenly with a lid on the pan.

What would you cook using this trick? Let me know in the comments below.

Happy Cooking!


Cashew Whipped Cream

Cashew Whipped Cream – Dairy Free, Gluten Free, Vegan

P1060684-2.jpg

This cashew whipped cream is a great alternative to store bought whipped topping, and it’s super easy to make.

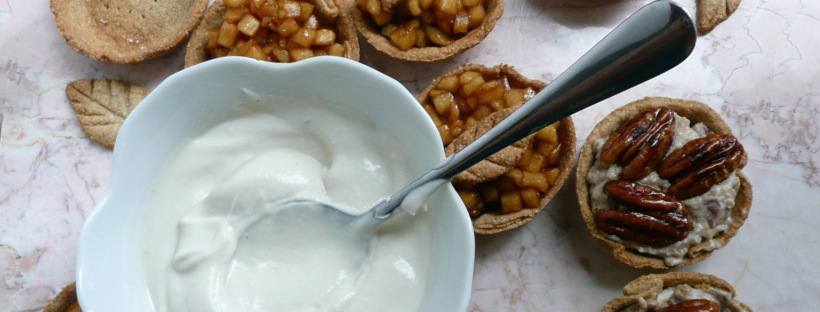
On it’s own, this cashew whipped cream isn’t super flavorful, but poured over a fresh summer peach it is absolutely spectacular, and it gives a wonderful creaminess when dolloped over mini pecan tarts, or pumpkin tarts at Thanksgiving.

Once it’s blended, you can add another tsp. of maple syrup, or a little more vanilla to taste, but the pie fillings will already be quite sweet, so try the cashew cream on a tart with some pie filing before adjusting the flavor of the cashew cream.

The oil may seem like a little bit of an odd addition, but it gives the cashew cream a little extra richness, and rounds out the flavor of the cashew whipped cream along with the sweetness of the maple syrup.

If you’re making a lot of tarts, you can easily double this recipe if need be. You can make this in advance and then keep it in an airtight container in the fridge until you’re ready to serve.

P1060787

Cashew Whipped Cream

Makes about ¾ cup.

Ingredients

½ tsp vanilla extract

1 tsp maple syrup

½ cup raw cashews (soaked overnight)

5 ½ tbsp. water

1 -1 ½ tsp avocado oil, or any neutral flavored oil (optional)


Instructions

1. Soak the cashews overnight, and drain. Add the cashews to a blender along with the rest of the ingredients and blend until smooth and creamy.

2. Spoon over fresh fruit or mini tarts. Serve.

Note – If you forget to soak the cashews, you can boil them for 50 minutes (it’s a long time I know, but they plump right up), adding water the pot occasionally if the water runs low. Drain them and allow them to cool to room temp before using

roasted sweet potatoes

Roasted Sweet Potatoes

P1060409

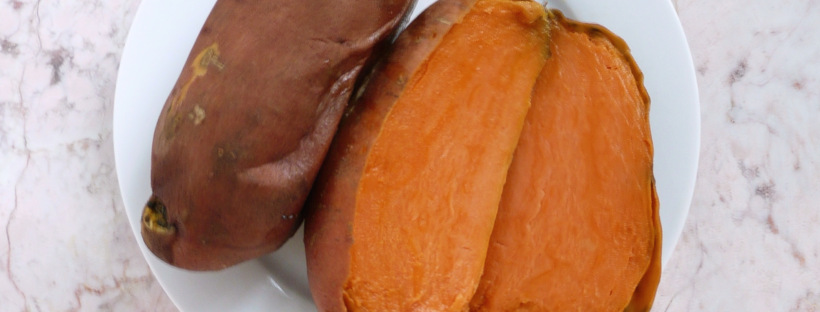
Roasted sweet potatoes are surprising versatile and super simple to make.
I roasted sweet potatoes a number of ways until I found Gwyneth Paltrow’s recipe for roasted sweet potatoes in her book It’s All Good.

This is a version of her recipe. I added the olive oil to crisp up the skin, and also put the sweet potatoes on a sheet pan (instead of roasting them directly on a baking rack) just for the sake of easy clean up.

I usually roast 4-5 of them at a time on a stainless steel baking sheet or a large glass pyrex dish, and they make a quick snack when I’m hungry but a little too tired to think to hard about what I want to eat. They usually get sweeter when they are refrigerated overnight. For a quick snack, I sprinkle them with a little cinnamon, and maybe a drizzle of little maple syrup if I’m craving something sweet

The cheapest place that I found organic sweet potatoes was at Costco (they don’t always have them) but you can get a 10 lb bag of them for around $11. Trader Joes almost always have them year round, and they are a little more expensive than Costco, but much cheaper than anywhere else.

You can puree them and use them to make my pumpkin tarts, mash them with some cinnamon and maple syrup, or add them to my vegan cheddar bay biscuits (recipe coming soon!).

Ingredients

4-5 sweet potatoes

½ – 1 tsp olive oil

Instructions

1. Preheat the oven to 425.

2. Give the sweet potatoes a good scrub. Pat them dry with a paper towel and prick them 4-5 times with a fork.

3. Rub the olive oil over the sweet potatoes, place them on a baking sheet or pyrex dish and roast for 1 hr.

4. If the sweet potatoes are thicker than 2 inches in diameter, cook them for an addition 15 -30 minutes until cooked through and you can pierce them with a paring knife with no resistance.

To clean up the caramelized/ blackened sweet potato goo, soak the pan or baking sheet overnight. Pour off the water and make paste from a little baking soda and dish soap. Use a scrubby sponge and baking soda paste to scrub off any of the remaining sweet potato goo.