pumpkin banner

A Trip to the Farmers Market

20180930_153326~2

It’s Fall!

My favorite season of the year.

It’s time to wear cozy socks, cuddle up with a book by the fire and drink / eat pumpkin spice flavored things with joy!

I love seeing all the autumn leaves turn color and am very much looking forward to Halloween and Thanksgiving (of course my favorite holidays are always food related…).

Recently, I discovered a local farmers market nearby and I didn’t know what I was missing until I went there. My weekly trips there are something that I look forward to on the weekends.

I’ve almost always shopped at grocery stores before, and it is so neat to be able to see all the different kinds of food that are produced in my local area. There are shelves with local honey, dried herbs, lots of different vegetables (I saw a purple bell pepper for the first time here a few weeks ago), and locally produced beef and lamb as well.

I buy fresh eggs often here. They come in a beautiful array of colors, from white, to brown, to pastel blue. The fresh eggs also taste so good, and the hens that produce them are free ranged.

20180930_160635~2

These beautiful carrots were $1.99 / lb, which is more expensive than the $1.29 / lb at the local grocery store, but these were locally grown. I also usually buy kale and lettuce here as well, and they are usually about 50 cents more per bunch. For not very much more, it seems really exciting to be able to support local farmers in my area.

I love seeing all the different kinds of squash that they had at the farmers market. A lady came by with a cart piled high with all kinds of them which she mentioned that she was going to use for decoration.

20180930_153504~3

I can see why, all of them look interesting. These beauties are Cinderella Pumpkins. So cool! I’ve never seen these kinds of pumpkins before.

It was also super cute to see parents taking pictures of their toddlers holding little pumpkins. What a sweet memory.

20180930_153626

They also sell lovely herbs (both dried and live plants) there. Here are a variety of mints!

20180930_153235~2

Two squash that kind of look like spaceships…

20180930_153215~2

And more varieties of squash!

Do you have farmers markets where you are? What’s you’re favorite thing to buy there?

Elaine

Iced Watermelon Cubes

Iced Watermelon Cubes – A Healthy Ice Cream Alternative

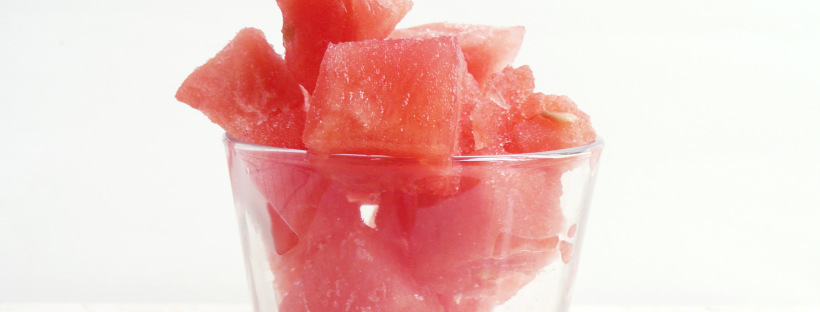
watermelon cubes 2

If you’re living through a heat wave at the moment what you probably want most in the world is something sweet, cold, and refreshing to eat.

Here is the simplest of desserts to keep on hand for a hot day. These little cubes of frozen watermelon are delicious and perfect for popping into your mouth (straight from the freezer) to cool you down.

Refined sugar free, dairy free, paleo, and all that jazz… but what’s really important is that they taste so good!

Iced Watermelon Cubes

Makes lots and lots of servings

Ingredients

1 sweet seedless watermelon (pick the sweetest one you can find)

That’s it! 😀


Instructions

1. Cut the watermelon into 3/4 inch cubes (this is a perfect size as they can be eaten straight from the freezer and they thaw quickly too).

2. Freeze the cubes flat in ziptop bags.

To serve, scoop about 1 – 1.5 cups (or however much you want) of the frozen watermelon cubes into a bowl and eat with a spoon.

Ta-Da! I hope that these little cubes of watermelon joy make your summer days a little more awesome. 🙂

pear sorbet

2 Ingredient Pear Sorbet (No Churn) – Paleo, Vegan, Refined Sugar Free

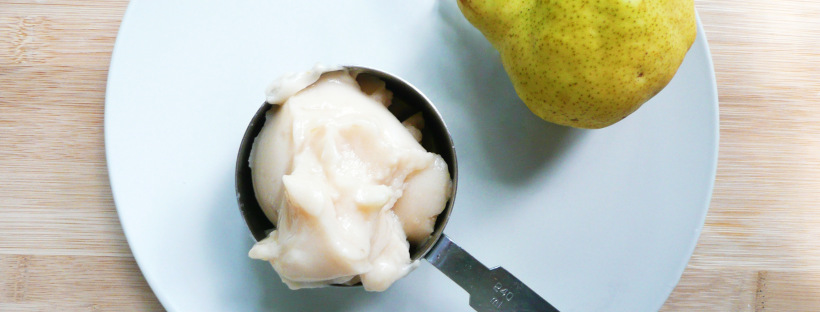
pear sorbet 3

This pear sorbet is so simple to make and it tastes amazing! It’s flavor is light and sweet and makes the humble pear really shine.

When I first tasted it I couldn’t believe how good it was, and it was only 2 ingredients!

It’s smooth and creamy, and the perfect thing to make when you have ripe pears that you’re not quite sure what to do with. Even if they are a little bruised, that’s ok! They will still work great in this recipe.

2 Ingredient Pear Sorbet

Makes 2 servings (2 scoops each, or a generous serving for one)

Ingredients

2 ripe Bartlett pears (also known as William’s pears)

1/4 cup apple juice (I used the Martinelli’s brand apple juice as it’s naturally very sweet)


Instructions

1. Peel and core the pears. Cut them into 3/4 inch cubes (if they vary in size a little that’s ok) and freeze them in a single layer in a ziploc bag or an airtight container.

My two pears (after being peeled, cubed, and frozen) measured 2 2/3 cups.

2. When you’re ready to make your sorbet, take the frozen pears out of the fridge and let them thaw for 10-15 minutes.

pear sorbet 1

Break up any big clumps of pear cubes up with your hands and add the pears to a food processor along with the apple juice and process until smooth, stopping occasionally to scrape down the sides.

pear sorbet 2 copy

If you’re having a hard time getting the sorbet completely smooth, you may have to process half the mixture at a time. I have a smaller food processor and had to process the sorbet in two batches, but it came together beautifully.

pear sorbet 6

3. Spoon into bowls and serve immediately.

Happy Eating!

blueberry smoothie

Glorious Orange Berry Blitz-ish Smoothie (Mango, Pineapple, Blueberry) – Vegan, Paleo

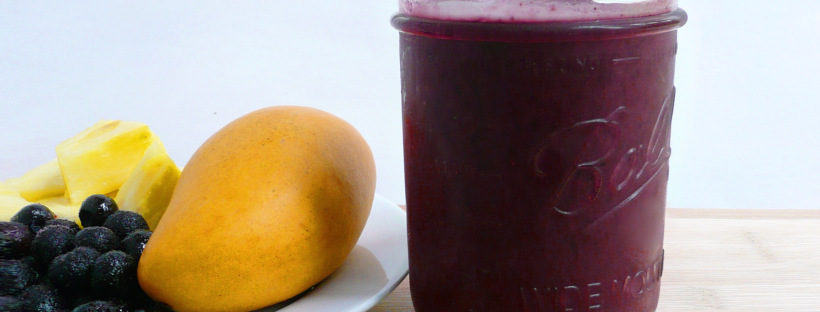
blueberry smoothie 1

When I was a youngin,’ I once went to a summer camp. The camp was located on a college campus and close by was a Jamba Juice. So most days (during the few weeks we were there), I and some of the other students would go to Jamba Juice for smoothies and a scone for breakfast.

My favorite smoothie was the (now discontinued) Orange Berry Blitz. I loved how the orange juice gave the blueberries and pineapple smoothie a wonderful brightness.

It’s funny how food and flavors can sometimes take you back, and suddenly, there you are again, cocooned in a marvelous memory.

I smile now just thinking of how happy I was that summer, and and this berry smoothie is still the perfect thing to drink on a nice summer day.

blueberry smoothie 2

This is my version of that glorious smoothie. I added mango because I think that it gives the smoothie a little more of a tropical flavor (and an extra little bit of sweetness as well).

Feel free to play around with the ingredients. Sometimes I replace the apple juice with water, or add in a few handfuls of baby spinach (if I want to get my greens in for the day without having to give it too much thought).

Make the smoothie that you want to drink (though I will say that this smoothie is pretty awesome as written) and have fun!

Glorious Orange Berry Blitz-ish Smoothie

Makes 1 generous serving

Ingredients

3/4 cup ripe mango (cut into roughly 1 inch cubes, about 1 mango)

3/4 cup fresh pineapple chunks (cut into about 1.5 inch wedges, canned pineapple works too)

1 1/4 cup frozen blueberries

1/2 cup apple juice (I used the Martinelli’s brand)

2-3 tbsp orange juice


Instructions

1. Add all ingredients into a blender and blend until smooth. Serve immediately.


Blueberry smoothie 3

This is what the plate of fruit looked like after I added the fruit into the blender. I think that it’s quite beautiful in a wabi-sabi kind of way.

I hope that you have many happy summer days drinking smoothies with your loved ones.

Enjoy!

Watermelon Agua Fresca – Paleo, Vegan, Refined Sugar Free

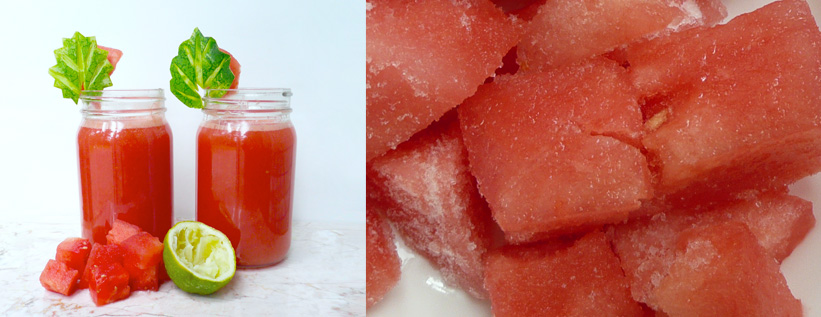
watermelon ag 3

With summer fast approaching, the weather is getting warmer, and Memorial Day weekend is here!

This means that ’tis the season for backyard barbecues and hanging out with friends and family in the sunshine. This calls for drinks.

One of my favorites is my watermelon agua fresca. It’s cool and refreshing, and along with iced apple green tea is a refined sugar free alternative to sweet tea.

I love watermelon. It’s one of my favorite fruits and drinking this is almost like drinking a cross between lemonade/limeaid and watermelon juice.

Watermelon season in the US runs from May to September, so lots of delicious ripe watermelons are available in grocery stores right now, which is super exciting (yay!) and another thing that makes this watermelon agua fresca the perfect drink for summer.

Watermelon Agua Fresca

Makes 2 servings (4 cups total)

Ingredients

4 1/2 cups cubed seedless watermelon (1 – 1 1/2 inch cubes)*

1 1/4 cup + 1/8 cup water

3 tsp lime juice (I used lime juice that froze previously and defrosted)

Notes – * Use the sweetest watermelon you can find, that way you won’t have to use any added sweeteners. If you’re having a party, you can make a big batch of this ahead of time and it will keep great in the fridge overnight.

Instructions

1. Add all the ingredients into a blender and blend until smooth. Refrigerate until well chilled, making sure to give the agua fresca a good stir before serving. Pour over ice if desired (especially if it’s a particularly hot day) and serve.

Iced Apple Green Tea – Easy, Paleo, Refined Sugar Free

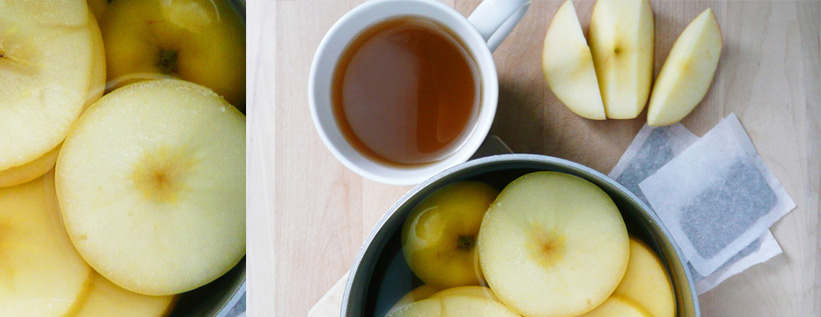
apple tea 4

If you love Southern Style Sweet Tea and are looking for something that is refined sugar free, this is a great alternative. This Iced Apple Green Tea is just as refreshing, and the apple juice gives this green tea a lovely fruity sweetness, perfect for warm weather and sunshine.

I have a friend who is Japanese who has the most beautiful and extensive tea collection. She has an amazing cabinet filled with teas from all over the world.

During one of our visits we drank a Pink Lady Apple Green Tea, from The Republic of Tea brand. I loved that tea, and for years I would always try and look for it in any grocery store that carried that brand of tea. As it turns out, that particular tea was a limited edition and has since been discontinued, but that’s ok!

As long as you have some apples, apple juice, green tea, and a little honey, you can make a tea as delicious as that one was.

I enjoy drinking it iced (it’s good warm too), which is great for this time of year, as the weather is turning a bit warmer now (which is really exciting!).

apple tea 5

Iced Apple Green Tea

Makes about 4-6 servings


Ingredients

5 1/4 cups of water

5 green tea bags (I used the Organic 365 brand ones)

2 1/2 cups of apple juice **

2/3 of a fuji apple, cut into 1/4 inch slices

2 tbsp honey

Notes – ** I used the Martinelli’s brand of apple juice because it tastes wonderful, but please feel free to use your favorite brand of apple juice.


Instructions

1. Bring your water to a boil. Add in the tea bags and the sliced apples. Allow the tea bags to steep for 3 minutes, and then remove the tea bags. Add your apple juice and allow the apple slices to steep in the tea for 1 hr.

You don’t have to do this but I save the tea bags and put them in cold filtered water (3 cups) and allow them to steep overnight in the fridge with some lavender (1/2 tsp dried lavender). This cold brew lavender tea has a very light subtle flavor.

The flavor will get stronger the longer that you allow the tea to steep, and I sometimes will add that cold brew lavender tea to the apple tea as well, which tastes great too.

2. Remove the apples from the tea, and stir in your honey.  You can save these apples slices to blend into a smoothie later.

Allow the tea to cool, transfer to an airtight container and refrigerate until well chilled.

apple tea 1

I hope that you enjoy the tea!

Tea is just one of those great things that brings people together. Do you have any favorite memories around drinking tea?


What To Do With Leftover Limes

P1080003-2

Limes are a great way to add zip and flavor to all kinds dishes from tacos, to pho, or sorbets, or pad thai. The the little burst of bright sourness that they give can instantly make a dish go from “good” to “Wow! This tastes AMAZING!”

Organic limes can be a little hard to find at my local grocery store. They also tend to be expensive if I don’t buy them in bulk. The cheapest place that I’ve seen them is at Trader Joe’s for about $2 for a bag for 4 -5 organic limes, so that’s where I tend to buy them from.

Limes are also not an ingredient that I tend to use very often, so before I figured out that there was a way to freeze them, I tended to buy a bag of limes when I really only needed one or two, and then forget that I had them at the back of the fridge until eventually I had to throw them out.

But no more! If you ever find yourself with leftover limes, here’s how to freeze them so that you have them on hand whenever you need them.

Instructions

1. Give your limes a good scrub with a vegetable brush. Juice them, and pour the juice into ice cube trays (any ice cube tray will do, this is just a circular one). Once the juice is frozen, transfer the lime juice cubes into a ziploc bag and keep in the freezer until ready to use.

You can set a few of the lime juice cubes in a little bowl on the counter to defrost, and then use the juice as needed.

2. Take the lime rinds and freeze them in a separate ziploc bag. You can zest the lime rinds from frozen when you need lime zest. The zest will defrost almost instantly once grated, and you can use it the same way that you would fresh lime zest.

If you find that the lime juice is a little bitter (some limes are bitter and some aren’t, I’m not entirely sure why) you can add a little maple syrup (if you’re vegan) or honey to your dish and it should balance out the bitterness.

I did this recently when I was making pico di gallo for a family get together and found the the limes that I had were a little bitter. So I added a little honey to the pico, and that smoothed out the bitterness and the bright flavor of the lime still came through. The pico came out great, and everyone happy ate their tacos and even went for seconds.

I hope that this helps you make the most of the times when you have fresh limes! If you use this tip, let me know what dishes you used your frozen limes for. It would be great to see all the different dishes that everyone was able to make with limes that they saved.


Mango Lemon Sorbet (No Churn) – Quick and Easy, Vegan, Paleo

mango 4

Sometimes the best kinds of foods are the ones that remind you of what you ate when you were growing up.

When I was a kid, we would often get takeout pasta and pizza from a local family owned Italian restaurant. The food was always good, but for me the highlight was getting to eat Italian ices anytime we ordered from that restaurant. This Mango Lemon Sorbet reminds me eating those Italian ices out of paper cups on hot summer days.

mango sorbet 2

Mango Lemon Sorbet is incredibly simple to make, and you don’t even need an ice cream maker! The mango gives the sorbet a joyful tropical flavor, and the lemon zest gives it a brightness and zing. Each bite just tastes incredible.

This recipe would also work well if you have a number of ripe mangoes that you don’t quite know what to do with before they become overripe.

mango sorbet 3

You can cut them into 1 inch chunks, freeze them, and make this mango sorbet anytime you like! It’s a delicious and satisfying way to cut down on food waste.

Mango Lemon Sorbet

Makes 1 generous serving (about 3 scoops)

Ingredients

2 cups frozen mango (1 inch chunks)

2 tbsp maple syrup*

1/2 tsp lemon zest (lime zest also works well)**

4 tbsp avocado oil (or any neutral flavored oil)***

1/4 cup water

Notes –

* The store bought frozen mango that I used wasn’t very sweet, so if your frozen mango is naturally very sweet, you can probably add less maple syrup. Just add a little at a time until you’re happy with the sweetness of the sorbet.

You can also omit the maple syrup entirely, and replace the water with 1/4 cup of apple juice instead if you’re trying avoid added sweeteners. The sorbet won’t be quite as sweet as it would be with the maple syrup, but will still taste really good.

**I actually used the frozen lemon rinds from this post for the lemon zest I used in this recipe.

** There is a part of the brain that lights up in the presence of a fat and sugar, so adding that little bit of fat makes the sorbet taste better, and helps to increase the absorption of the vitamin A from the frozen mango.

Instructions

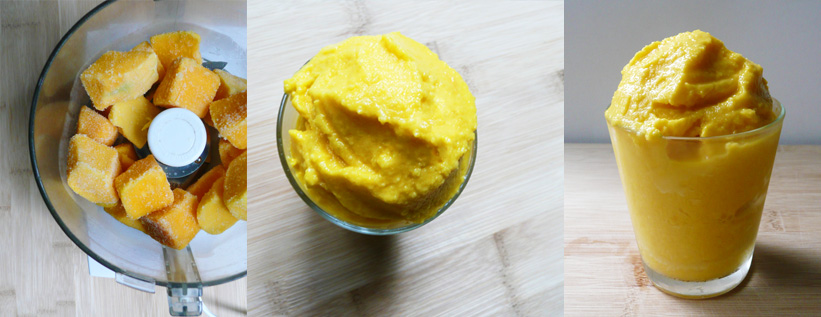
1. Lay your mango pieces onto a plate in a single layer, giving a little space between each piece of frozen mango if possible. Allow the mango to defrost for 15-20 minutes until you can pierce the cubes of mango with a fork with little resistance.

2. Transfer the mango to a food processor and add in the water, avocado oil, lemon zest and maple syrup to taste.

Blend until smooth, stopping to occasionally scrape down the sides of the food processor with a spatula.

3. Serve immediately, or you can make a big batch of this and freeze it it for later in an airtight container. Allow to defrost for a bit before scooping and serving.

mango sorbet 5

So good… and so simple to make! I’ll definitely be making this more often come summertime.

Happy Eating!

Joyful Fruit Salad – Vegan, Paleo

fruit salad

There’s a really funny writer/actor/comedienne extraordinaire named Tiffany Haddish who has a dish called “Joyful Greens.” She says that they are “Joyful Greens” because she smiles when she picks the collard greens from her garden, she smiles when she washes them, and she smiles when she cooks them. All that joy, love and care that she puts into growing and preparing the greens make them extra delicious.

Taylor Swift also loves Tiffany’s Joyful Greens. Tiffany brought them with her to one of Taylor’s dinner parties and where they also dined on homemade barbecue chicken, potato salad, and cornbread (don’t we all wish that we could have been at that dinner party? It’s sounds amazing.)

Here’s a video of Tiffany teaching Oprah and Ellen how to make them.


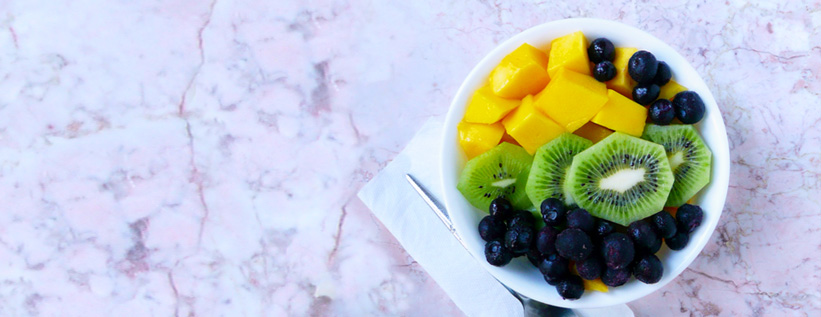
While I didn’t grow these fruits myself, this is my joyful fruit salad. It’s joyful because you smile while you’re picking out the fruit (you smile at how wonderful and sweet that ripe mango smells), you smile when you see how bright and happy the different colors of the fruits are together, and you smile when you eat it (because it tastes so good…)

It’s super quick to put together, and I like packing it in a lunch because the colors look so cheerful together that I always look forward to eating it. This combination of fruits taste lovely together, and eating it feels like a real treat.


Fruit Salad 3


Joyful Fruit Salad

Makes 1 generous serving

Ingredients

1 ripe mango*

1 ripe kiwi**

1/3 cup blueberries (fresh or frozen)


Notes – *Ripe mangoes smell very sweet and fragrant. Mangoes that aren’t ripe won’t smell much like anything.

** Ripe kiwis are soft, but not squishy. If you have one that’s really firm, go ahead and leave alone for a couple days and it will ripen up.


Instructions

1. Cut the mango into 3/4 inch cubes (or cut it up however you like, this is just how I do it).

There are many ways to cut up a mango. I slice the cheeks off either side of the seed, then try and carefully slice off any remaining mango flesh that I can off of the seed. Then I cut the mango cheeks into 3/4 inch strips and use a paring knife to carefully separate the peel from the mango flesh (kind of like how you would peel an apple with a paring knife). I then cut the peel away from the slices of mango that I cut away from the seed into rough chunks and add them to a bowl with the rest of the cubed mango.

I’ve also seen people use a potato peeler to peel the mango and then slice the mango cheeks off either side of the seed, but I don’t do it that way because I find that the mango gets really slippery to hold while you’re trying to make your initial cuts.

All this is to say, cut up your mango in a way that works for you. The fruit salad will still be awesome.

2. Peel your kiwi and slice it into 1/4 inch slices.

How I peel a kiwi – Cut 1/4 inch off the top and bottom of your kiwi. Sit it flat on your cutting board and make 1/2 inch slices down the sides of the kiwi, cutting as close to the peel as you can until you’ve cut off all the kiwi peel.

You can also cut 1/4 inch off the top and bottom of a kiwi and slide spoon between the kiwi peel and the green flesh. Rotate your spoon under the peel until the peel has completely separated from the fruit.

3. Add your kiwi to the bowl of cubed mango along with the blueberries.

Enjoy!


fruit salad empty

What the bowl looks like once I packed the rest of it into a mason jar for tomorrow’s lunch. This is what was leftover, which looks very pretty on it’s own.

No worries, this didn’t go to waste. I ate it right after I took the picture, and I felt very happy and grateful.