salmon sushi

Salmon Salad Sushi – Super Easy

P1080078-2

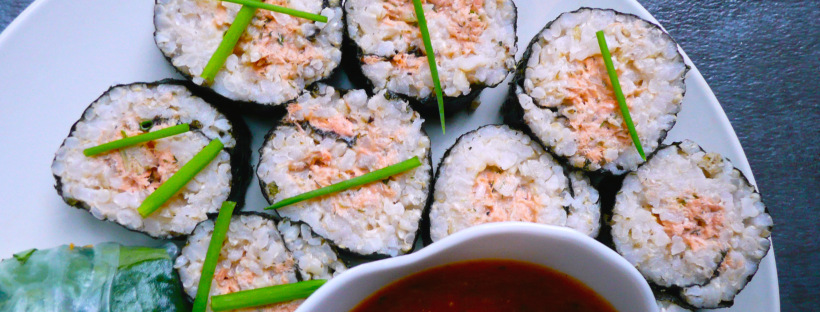
I love tuna salad, and this is a slightly fancier version but is still super simple to make. It’s perfect for a quick dinner, or an easy snack and you can use up your leftover brown rice or salmon to make this tasty dish.

Salmon Salad Sushi

Makes 8 pieces (2 snack size servings, or 1 serving for a hungry person)

Ingredients

1/3 cup cooked flaked salmon (canned salmon is fine too)

2 ½ tbsp. mayo (I used an avocado oil mayo)

1/8 tsp dijon mustard

2 ½ tsp finely chopped green onion

3 tsp lemon juice

tiny pinch of pepper

¼ tsp dried parsley

1/8 tsp granulated garlic

¼ tsp sea salt

1 ½ cups warm cooked brown rice (I just steam it for a few minutes in the rice cooker to warm it up if it was in the fridge)

1 sheet of nori

Instructions

1. Stir together the salmon with everything but the rice and nori.

2. Lay the nori sheet on a plastic wrap covered bamboo mat.

Wet your fingers, and spread the warm rice on the nori into a thin layer leaving about a ¾ inch of nori uncovered at the top of the sheet.

3. Spoon the salmon salad into a line at the bottom of the rice covered nori. Roll firmly into a sushi roll, and set in the fridge for 10 – 15 minutes to firm up. Cut into 8 slices and serve.

P1080077-2

Salmon Salad Sushi and Vegan Thai Peanut Sauce with Veggie Spring Rolls

The snack plate of dreams…

sunshine smoothie

Good Morning Sunshine Smoothie – (Strawberry, Apple, Pineapple) – Easy, Vegan, Dairy Free, Delicious

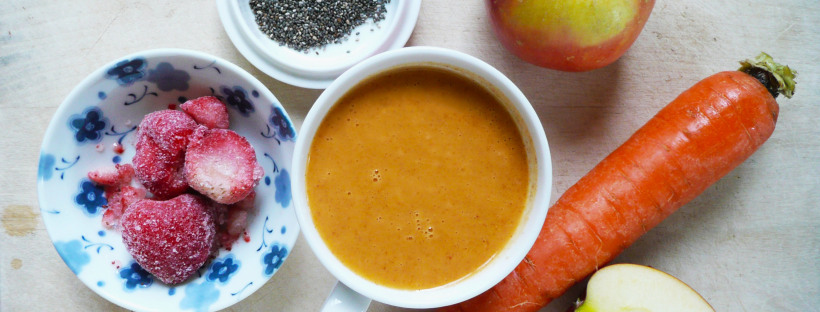
Sunshine smoothie

This super pretty smoothie looks like sunshine in a cup. It’s a snap to make and is not only delicious, but also full of healthy and anti-inflammatory ingredients.

Chia seeds provide omega-3 fatty acids, and avocado oil is a monounsaturated fat that helps to increase the absorption of the beta carotene from the carrots. The pineapple adds sweetness (if you use fresh pineapple then you get the benefit of an added anti-inflammatory enzyme called bromelain which helps with pain) and the strawberries add anthocyanins (the compounds that give the strawberries their color) which can help boost neurogenesis (helping your brain to produce new brain cells).

What I’ll sometimes do is pour one serving of the smoothie into a screw top jar (just an empty jar of coconut oil that I’ve washed and cleaned out) and keep it in the fridge to drink later in the day. It’s a filling smoothie and drinking this is usually satisfying enough that I can walk by the wall of chocolate candy at the grocery store and not crave any of it.

The apples, strawberries and pineapple give the smoothie a lovely sweetness, but if you want the smoothie a little sweeter, you can squeeze in a little honey to taste.

Good Morning Sunshine Smoothie

Makes 2 generous servings

Ingredients

1 1/2 fuji apples, roughly chopped

1 large carrot, but into 1/2 inch slices (about 1 cup)

1/4 cup canned pineapple + 1/4 cup of the pineapple juice*

8 strawberries (fresh or frozen) about a scant 1 cup

1 1/2 tbsp chia seeds

1/2 – 1 tbsp avocado oil (or any neutral flavored oil)

1 1/2 cups water

Squeeze of honey (optional)

*If you don’t want to use canned pineapple, Trader Joe’s sells pineapple juice in a carton which tastes great. You can just add a few splashes of that to the smoothie instead of the canned pineapple for sweetness.

Instructions

Add all ingredients into a blender and blend until smooth. Pour into cups and serve.

If your blender isn’t that great at blending frozen things, you can let the strawberries thaw for 15-20 minutes before blending.

I hope that this colorful smoothie brings a little joy and sunshine to your day!

Creamy Lemon Garlic Black Bean Dip

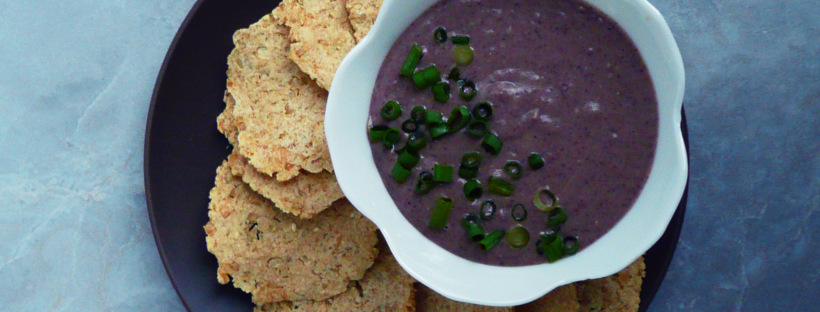
Creamy Lemon Garlic Black Bean Dip

P1070086 copy

I love hummus, and this dip originally started out as a black bean hummus, but I kept adding more lemon juice and more green onions until it became something slightly different, something even better.

It’s thinner than store bought hummus, but still wonderfully creamy and has an incredibly bright happy flavor from the lemon juice, which works well with the flavors of the garlic and green onion (which sort of prance around in the background and bring even more joy to the party).

It’s better if you make it a day ahead, that way the lemon juice will mellow out the sharp flavor of the garlic and the dip will be extra delicious.

I hope that you give this dip a try!


Creamy Lemon Garlic Black Bean Dip

Makes about 2 -3 servings

Ingredients

7 tbsp + ½ tsp fresh lemon juice

3 cloves fresh garlic

1 can black beans, drained

4 tbsp. + 1 tsp olive oil

4 tbsp finely chopped green onion

1/2 tsp sea salt

1/8 tsp black pepper


Instructions

Add all ingredients to a food processor and blend until smooth.

If you like things more lemony you can add another 1 tbsp of lemon juice, or more to taste.

Transfer the mixture into a bowl, cover with a lid or plastic wrap and refrigerate overnight.

Serve with tortilla chips or cut veggies, and if you’d like you can sprinkle over some finely chopped green onion for color and extra crunch.

Chocolate Banana Soft Serve Ice Cream – Refined Sugar Free, Dairy Free, Vegan, Paleo

P1080366

When I think of chocolate desserts, I want something really decadent and rich, with a deep chocolatey flavor.

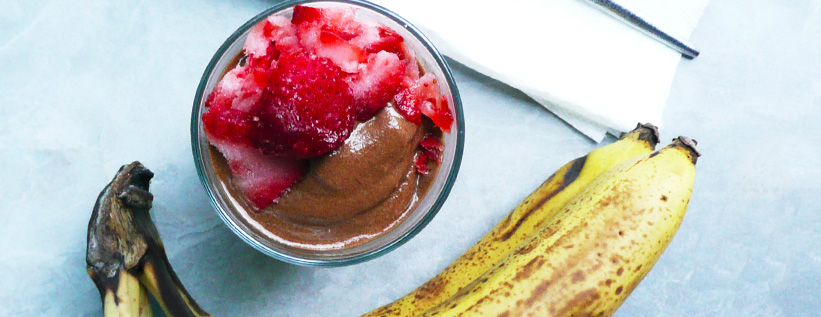
This Chocolate Banana Soft Serve Ice Cream definitely fits the bill. It’s super easy to make, and takes almost no time or effort. It’s so creamy and delicious, and it’s pretty incredible that blended up frozen bananas can turn into such an amazing treat!

When I was working on this recipe, I thought about the rich and creamy chocolate ice cream that would occasionally eat before I went dairy and refined sugar free.

I really tried to get a similar flavor with this recipe, so it does have more cocoa powder and vanilla extract than you would expect it to have, which gives the banana ice cream a similar flavor to the store bought chocolate ice creams of my younger days.

Banana ice cream also cuts down on food waste because it’s the perfect thing to make when you have overripe bananas that you don’t know what to do with. No need to throw them away! Just peel them, and freeze them, and you can have ice cream whenever you want. How cool is that?

You can also adjust the flavor of the ice cream to your liking really easily. If you want it a little sweeter (or if your bananas could have used a little more ripening before you froze them) you can add a little more maple syrup, or more cocoa if you want a deeper chocolate flavor.

However you make it, I hope that this ice cream brings a little more joy to your day.


Chocolate Banana Soft Serve Ice Cream

Makes 1 serving (about 3/4 cup)

Ingredients

1 thawed frozen banana

3 1/2 tbsp unsweetened cocoa powder *

2 1/2 tbsp + 1 tsp maple syrup

2 tbsp + 2 tsp water

1 tsp vanilla extract

tiny tiny pinch of salt


*I didn’t use a heaped tbsp, just sort of slightly higher than a level tbsp. The cocoa powder that I used was the Ghirardelli unsweetened cocoa powder.

Instructions

1. Cut the thawed banana into half inch slices with a paring knife. If the banana is too hard to cut, then let it thaw for another 5 minutes or so before trying to cut it again.

2. Add all the ingredients into a food processor and process until smooth, scraping down the sides of the bowl occasionally.

If you want a firmer texture, you can spoon the mixture into a bowl and put it into a freezer for another 15-20 minutes.

For garnish, I just used a paring knife to shave pieces off a slightly thawed frozen strawberry. It gives it a nice color and a bit of little flair, and the strawberry flavor goes well with the banana and chocolate flavors of the ice cream.

P1080371

Happy Eating!


Shrimp Pad Thai

Weeknight Shrimp Pad Thai – Easy and Quick Recipe – Refined Sugar Free

P1080345

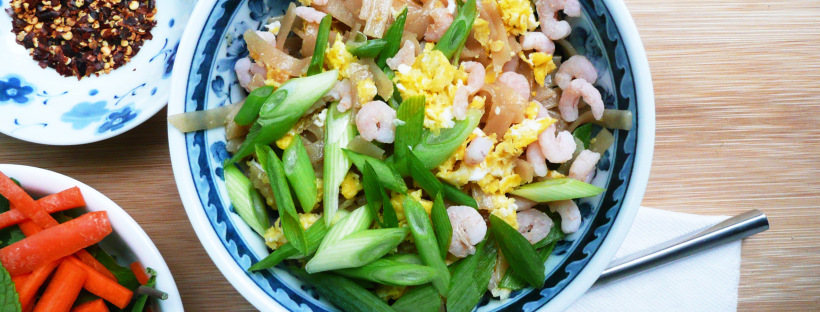
Pad Thai is the kind of dish that you love to eat, but are not quite sure how to make yourself.

At least that’s what I thought until I found a really easy recipe for pad thai on Goop.

What I really loved about the recipe from Night + Market on Goop was how simple the recipe was. I love pad thai, but most of the recipes that I found online had a lot of specialty ingredients that I would have to go a little out of the way to find.

I never attempted to make it myself before, but that recipe looked so easy, and with a few swaps, I knew that I could make a pad thai that would work with my dietary restrictions.

P1080307-2

This pad thai is made from ingredients that you can find at your local grocery store, and can be made in about half an hour. Perfect for a weeknight dinner.

Also great if you’re craving pad thai, but don’t live anywhere close to a Thai restaurant…

I used wild caught pink shrimp from Oregon (which I was able to find at my local supermarket in the display case at the seafood section, but I’ve also seen it sold at Costco as well). I only buy this kind of shrimp these days because it’s sustainably harvested, and also because it doesn’t contain any preservatives or ingredients that many other frozen shrimp are processed with.

The working conditions for people who catch, farm, and process shrimp around the world can also be very harsh and inhumane, so by purchasing domestically caught shrimp, I hope that I’m supporting more ethical working conditions for people who work in the shrimping industry.

You can find more information about Oregon Pink Shrimp here. This isn’t an affiliate link, just more info in case you’re curious about how the shrimp are caught.

P1080304

This type of shrimp is pretty inexpensive, at about $8 – $9 per lb, and it’s also just as tasty as the larger shrimp which makes it a good buy in my book. The amount of pink shrimp in this dish cost about $1, so while this pad thai feels very luxurious, it’s actually really budget friendly.

For more information on what to look for when buying shrimp, you can check out this article here.

About the fish sauce, I use the Red Boat brand fish sauce, because it’s only made from anchovies and salt (and therefore paleo, and refined sugar free). You can find it online, but I managed to find a bottle of the 500 ml (17 oz.) size for about $7 at my local Asian market, so it’s worth checking out your local Asian market if you have one nearby to see if they have it cheaper than online.

The noodles that I used were Fettuccini Style / Pad Thai noodles from Tinkyada which I found at my local grocery store. They weren’t organic, (but hey, it happens, you do the best you can). They were also on sale, which was definitely a plus, and the noodles worked great for this recipe.

brown rice noodles.jpg

There is a decent amount of maple syrup in this recipe, so if you’re watching your sugar intake, this may not be a meal that you eat every night, but it is certainly a really amazing and tasty dinner to have as a treat every once in a while.

If you’re planning on eating a few sides along with this (like a salad, fruit, etc.) this recipe makes enough for 2 smaller servings, but if you’re just eating it by itself, then it’s really just enough for one person, especially if you’re really hungry.

I hope that you give the recipe a try! It’s so good, and you’ll be super proud that you made a dish that you once thought that you could only enjoy in restaurants.


P1080350

Weeknight Shrimp Pad Thai

Adapted from this recipe.

Makes 2 servings, or 1 larger serving for a very hungry person.


Ingredients

4-5 oz of dried brown rice noodles *

4 tbsp of maple syrup

2 tbsp of fish sauce

2 tbsp of apple cider vinegar

1/3 cup of frozen pink shrimp

1-2 eggs (depending on how hungry you are)

2 green onions, thinly sliced


1 lime, cut into wedges for serving


* Note – If you hold the noodles between your thumb and forefinger, the circle that 4-5 oz. of noodles should make will be about the size of a quarter.

If you can get your hands on some bean sprouts, then definitely add those in too, as they add a nice crunch to the dish. I just couldn’t find any at my local grocery store, but the dish was still incredibly tasty.


Instructions

1. Make a skillet non-stick, and scramble your eggs. Tip the cooked eggs onto a plate and set aside.

2. Put the shrimp into a strainer and rinse under cool water. Place the shrimp into a medium size saucepan and cover them with about an inch of water. Bring the water to a boil and let the shrimp cook for a minute or two before draining. Set the shrimp aside.

The shrimp is already cooked, I just do this because it brings the shrimp up to temperature, but also kills off any potential pathogens that it may have picked up while it was sitting in the display case with raw fish.

3. Fill the medium saucepan with water and then cook your noodles. The directions for this package of noodles said to cook them for 10 -11 minutes, but I only cooked them for 6-7 minutes. You want to undercook your noodles a bit, as you’re going to finish cooking the noodles in the pad thai sauce. Drain the noodles and set aside.

4. Stir together the apple cider vinegar, fish sauce, and maple syrup. Add the sauce to the skillet along with the cooked noodles and cook over medium heat, stirring frequently until the noodles have absorbed all the sauce.

5. Add in the green onions, cooked eggs, and shrimp and stir them through the noodles, and continue to cook them for another 30 seconds or so until the eggs and shrimp are warmed through.

6. Spoon the noodles into a bowl (or two bowls) and serve with lime wedges, and a little bowl of red pepper flakes on the side.


P1080354

(I ate half of the pad thai before I realized that I had forgotten to photograph the lime wedges as well… Whoops. It was so good…)

The Very Best Gluten Free Pancakes – Oat Flour, Vegan and Egg Free Friendly, Dairy Free

P1090017

(These are the vegan pancakes, made with maple syrup)

When I first started on this gluten-free, food sensitivity journey, I found out that I couldn’t tolerate many of the ingredients in store bought gluten-free flour mixes.

And I missed pancakes.

pancake perfected
I missed eating them with maple syrup, and fresh peaches in the summer time. I missed eating them them with strawberries and blueberries. Pancakes are a very nostalgic and American food, and it really felt like I was missing out by not being able to eat them.

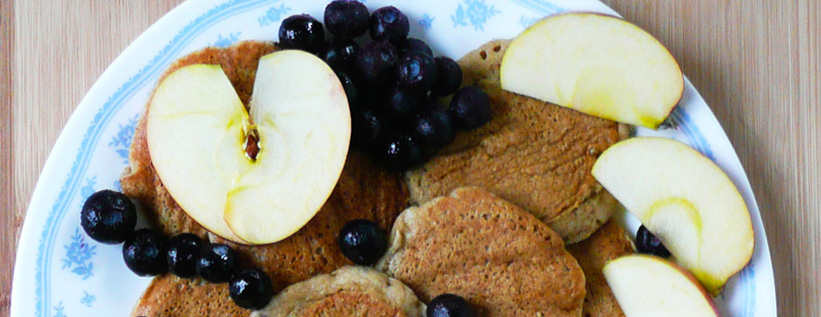
It took me a year and a half to get this pancake recipe perfect, but I’m honestly so glad that I kept at it until I figured it out. These pancakes are wonderful! They are slightly crispy on the outside, and pillowy soft on the inside. They are not gummy at all.

pancake stack cropped- corner fixed

They are made from simple ingredients, and cost very little to make.

The first time I finally figured out this recipe, I flipped over the first pancake and my heart skipped a beat when I saw how beautiful and golden that little pancake was. I had finally gotten it right, and it was so exciting!

P1070032 corner fixed

(The non-gummy cross section of the pancakes).

They are perfectly sweet, so you don’t absolutely need to drizzle over more maple syrup when you serve them, but you can of course! Especially if you like your pancakes extra sweet.

They are pretty hearty little pancakes and very filling. Each batch serves about 2 people. I have been known to make extras, and then eat them out of the fridge cold when I was too tired to think of something else to eat.

They work great for this! Especially after a long day if you’re being tempted by the siren call of those cookies you stashed away in the cupboard from your pre-gluten free days. You can eat these instead, and not feel ill afterwards.

You can pack a few of them in a little Tupperware container with some berries (fresh or frozen is fine) for breakfast. They heat up well in a toaster oven as well.


The Very Best Gluten-Free Oat flour Pancakes

Makes 10 pancakes (about 2 servings)

Ingredients

200 gm oat flour – or about 2 1/4 cup + 3.5 tbsp by volume *

scant ½ tsp of baking soda

tiny pinch of salt


1/4 cup of maple syrup

1/4 cup tbsp of melted coconut oil

2 eggs **

½ cup of water

1.5 tbsp of apple cider vinegar


Instructions

1. Sift together the oat flour, baking soda and salt.

2. In a separate bowl stir together the water, maple syrup, vinegar, eggs and the melted coconut oil.

3. Pour the wet mix into the dry, and stir this altogether until pretty smooth. Set this mixture to the side, and set a timer for 15 minutes.

During this time, make your stainless steel pan non-stick.

4. When there’s about 3 minutes left on the timer, start to heat up your pan.

If medium heat on your burner is a 5, set the heat to 4. You want to be just a little lower than medium heat.

5. When the timer goes off, give your batter a good stir (no gluten means not having to worry about over-mixing this batter).

Spoon 2 tbsp of pancake batter onto your pan for each pancake, and use the back of your spoon to gently spread the batter into a little circle, just to smooth out the shape of your pancake.

Cook the pancakes 1 min to 1.5 minutes on the first side until you see small bubbles forming on the surface of the pancake, and the sides have firmed up.

Flip the pancakes over and cook another 20-30 seconds until they are a pale golden brown, then stack the pancakes on a plate to the side. I usually cook 2 pancakes at a time so that I have room to flip them (I cook them in a 10 inch skillet). If the pancakes start to brown too fast, turn your heat down a little and cook them for a shorter amount of time on the first side.

The batter should be a little on the thick side so that the pancakes cook up nice and fluffy.

If you like thinner pancakes, you can add about 1-2 tbsp of water to the mix to thin it out. If the batter is too thin, stir in a little oat flour to thicken the batter up again.

If you use 2 tbsp of batter per pancake, then they end up about 4 inches in diameter. You can make the pancakes larger by using more batter, and adjusting the cooking time.


pancake duo closeup

(Adult Pancake – 2 tbsp batter, and Baby Pancake – 1 tbsp batter).

* Notes – Ideally you would weigh out the oat flour, but measuring it by cups and tablespoons will work in a pinch.

Costco sells organic maple syrup for $12 – $13 / liter. The oats I grind myself in a blender (wearing earplugs, because it can be noisy). Don’t use a food processor to grind the oats, because it won’t be able to grind the flour fine enough. I put any extra oat flour into an airtight container and use it for other recipes.

** Substitutions – you can sub white vinegar for apple cider vinegar, and any neutral flavored oil for the coconut oil. You can also swap out a few tablespoons of maple syrup for water if you want them less sweet. The maple syrup just gives the pancakes a mild sweetness and a nice brown pancake color.

***Egg-free and Vegan versions – This pancake recipe is the gift that keeps on giving. It continues to amaze me every time I eat them, and make them with or without eggs.

To make them egg-free, just swap out the eggs for an extra 1/4 cup of water per egg. The texture isn’t quite as fluffy as when you use the egg, but definitely still respectable, and much better than when I tried to use a banana to bind the pancakes instead.

I’ve also made a version where I swapped out the maple syrup for 4 tbsp of honey, and used an extra 1/2 cup of water instead of the 2 eggs. They were very good as well, and the honey also acts a little as a binder.

If you make the pancakes egg free, use 1 tbsp of batter for each pancake instead. Making the pancakes smaller makes it easier for them to cook through, and you’ll get a better texture than if you made them larger. I was very surprised at how beautiful the honey egg free pancakes were that I made today. They were a beautiful light golden brown when I flipped them over, and I was happily shocked that it worked as well as it did.


I served the honey ones today with a little jam that I made from just cooking down some frozen peaches, blackberries, blueberries and a dash of maple syrup over medium heat until thickened. It was so good!


two pancakes perfected

It’s amazing how much joy a pancake recipe can bring. However you make these pancakes, I hope that you enjoy them and get to share them with someone that you love.

Let me know how the recipe works out for you.

Happy Eating!