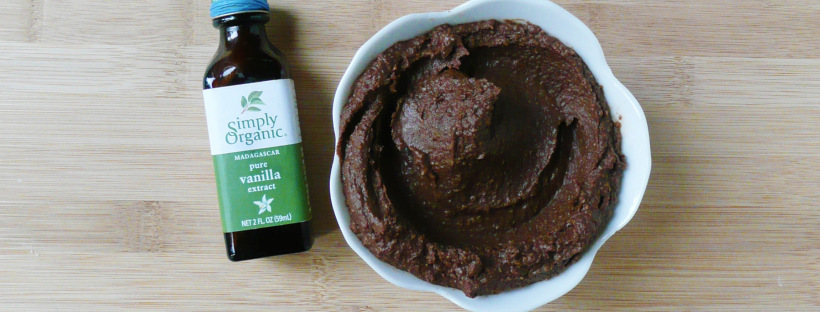
fudgy chocolate frosting

The Fudgiest Sweet Potato Chocolate Frosting – Dairy Free, Refined Sugar Free, Vegan

Fudgy Chocolate Frosting

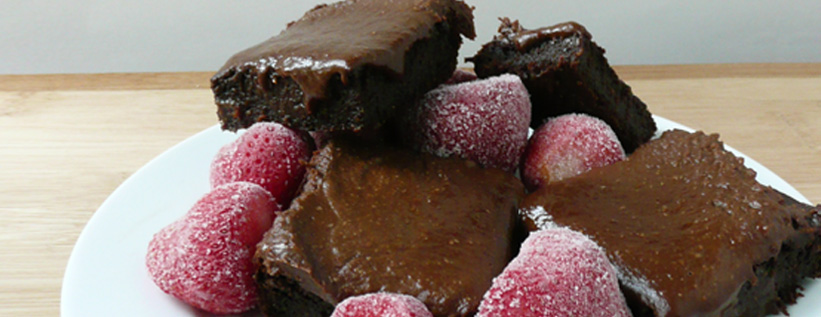
This fudgy chocolate frosting works great over my Chewy Sweet Potato or Adzuki Bean Brownies, and it’s delicious enough that you can eat it by itself with a spoon. It tastes better than any store brought chocolate frosting, and it’s refined sugar free and dairy free.

It’s stable enough of a frosting that you can pipe designs with it and give cupcakes or brownies a little extra joy and decoration if desired.


The Fudgiest Sweet Potato Chocolate Frosting

Makes 1 cup (enough for 1 batch of brownies)

Ingredients

4 1/2 tbsp cocoa powder (25g)

1/4 cup oat flour (27g)*

1/2 tbsp ground chia seed (about 2.5g)

level 1/4 tsp sea salt


1/4 cup water

level 1/4 cup mashed roasted sweet potato

1/4 tsp vanilla extract

1/4 cup + 1 tsp maple syrup

5 tbsp melted coconut oil


Notes – * I grind oats into oat flour using a blender. Don’t grind the oats in a food processor because the flour won’t be fine enough.

Any extra oat flour I don’t use in the recipe goes into an airtight container and I use it for another recipe.

If you’re making this recipe for someone who has celiac disease, use certified gluten free oats, as the oats from the bulk bins can sometimes be processed on the same equipment as wheat.


Instructions

1. Add all the ingredients to a food processor and blend until smooth. Transfer to a bowl and gently heat over a double boiler and stir until glossy.

If eating with brownies, spread the frosting onto the brownies while the frosting is still warm and glossy. If you frost the brownies while the frosting is still warm, then the frosting will stay glossy when it cools and sets.

If you want to use this frosting to pipe flowers or designs, then the frosting needs to cool to room temperature before you transfer it into a piping bag. You can make this frosting in advance if needed and keep it in the fridge, and either heat it very gently and quickly over a double boiler, or let it sit a room temperature until softened before piping.


The Best Chewy Sweet Potato (or Adzuki Bean) Brownies – Gluten Free, Dairy Free, Refined Sugar Free, Vegan

sweet potato brownies

This is one of my best recipes.

These brownies are the brownies of dreams. They have a rich, deep chocolate flavor, but are not too dark or too sweet, and they taste like the best brownie you’ve ever had.

I came up with this recipe one day when I needed to use up some extra sweet potatoes that I had in the fridge. Somehow this recipe came together so quickly (and I worked perfectly the first time!), and taking the first bite of these brownies made my heart sing. I couldn’t believe how good they were, and they were vegan! And made from leftovers!

The cool thing about this recipe is that you can also make them with adzuki beans (if you have any leftover red bean soup).  They actually turn out slightly chewier when made with adzuki beans rather than sweet potatoes, but both kinds of brownies are fantastic.

With brownies, most people fall into two camps – chewy, or fudgy. These brownies are the perfect marriage between the two, because the actual brownies are wonderfully chewy, and the frosting is gloriously fudgy.

They don’t need the frosting, as they taste good enough without it, but a little frosting never hurt a good brownie.


The Best Chewy Sweet Potato (or Adzuki Bean) Brownies

Makes 9 brownies

Ingredients

1 tbsp ground chia seed (5g)

¼ cup + 1/8 cup hot water


1 cup of oat flour (90g)*

5 tbsp + 2 tsp cocoa powder (34g)

½ level tsp baking soda

½ level tsp + 1/8 tsp ground coffee (I used Starbucks Italian Roast Ground Coffee, which is also Fair Trade Certified, which makes it extra cool)

½ level tsp sea salt


2 tbsp apple cider vinegar

1 tsp of vanilla extract**

level ½ cup mashed roasted sweet potato (if using adzuki beans use ½ cup + 3 tbsp drained cooked beans instead of the sweet potato)

½ cup maple syrup

¼ cup + 1/8 cup melted coconut oil


Notes – for best results, please measure the dry ingredients by weight.

* I grind oats into oat flour using a blender. Don’t grind the oats in a food processor because the flour won’t be fine enough.

Any extra oat flour I don’t use in the recipe goes into an airtight container and I use it for another recipe.

If you’re making this recipe for someone who has celiac disease, use certified gluten free oats, as the oats from the bulk bins can sometimes be processed on the same equipment as wheat.

**If you run out of vanilla extract ( and it’s been the kind of day where you really need a brownie) have no fear, these brownies still taste amazing without it. So go forth, and bake with a light heart.

sweet potato brownies 2.jpg

Instructions

1. Stir together the ground chia seed and hot water. Let sit for 10 minutes until thickened.

2. Add the cocoa, oat flour, salt, coffee and baking soda into the food processor and give it a quick blend so that everything is well combined.

3. Add the rest of the ingredients to the food processor and blend until smooth.

4. Turn the oven to 350F and let the mixture sit in the food processor for 15 minutes. Then give it one final blend for about 30 seconds and then spoon the mixture into a glass 8×8 inch baking dish that you’ve oiled and floured with coconut oil (or a neutral oil like avocado oil) and a bit of oat flour.

Take a spatula and smooth the brownie batter out so that it’s sitting evenly in the baking dish.

5. Bake the brownies at 350F for 70-75 minutes until the brownies pull ¼ inch away from the pan on all sides.

Allow to cool completely (at least an hour for the best texture), frost with fudgy sweet potato chocolate frosting if desired, and then cut into 9 square pieces. Serve and enjoy!

I hope that you love these brownies as much as I do, and if you’re having a tough day, I hope that these brownies make it just a little bit better and brighter.  🙂

salmon sushi

Salmon Salad Sushi – Super Easy

P1080078-2

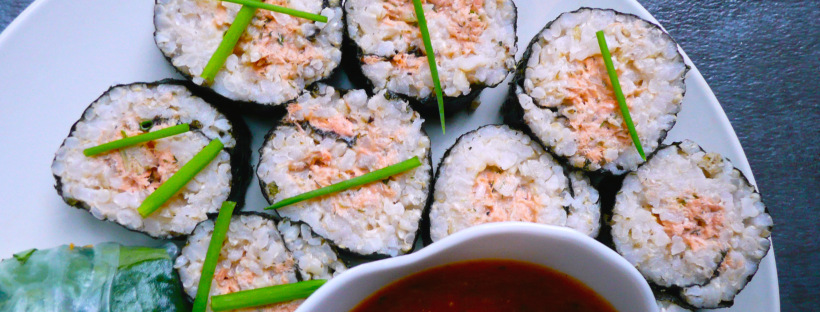
I love tuna salad, and this is a slightly fancier version but is still super simple to make. It’s perfect for a quick dinner, or an easy snack and you can use up your leftover brown rice or salmon to make this tasty dish.

Salmon Salad Sushi

Makes 8 pieces (2 snack size servings, or 1 serving for a hungry person)

Ingredients

1/3 cup cooked flaked salmon (canned salmon is fine too)

2 ½ tbsp. mayo (I used an avocado oil mayo)

1/8 tsp dijon mustard

2 ½ tsp finely chopped green onion

3 tsp lemon juice

tiny pinch of pepper

¼ tsp dried parsley

1/8 tsp granulated garlic

¼ tsp sea salt

1 ½ cups warm cooked brown rice (I just steam it for a few minutes in the rice cooker to warm it up if it was in the fridge)

1 sheet of nori

Instructions

1. Stir together the salmon with everything but the rice and nori.

2. Lay the nori sheet on a plastic wrap covered bamboo mat.

Wet your fingers, and spread the warm rice on the nori into a thin layer leaving about a ¾ inch of nori uncovered at the top of the sheet.

3. Spoon the salmon salad into a line at the bottom of the rice covered nori. Roll firmly into a sushi roll, and set in the fridge for 10 – 15 minutes to firm up. Cut into 8 slices and serve.

P1080077-2

Salmon Salad Sushi and Vegan Thai Peanut Sauce with Veggie Spring Rolls

The snack plate of dreams…

baby spinach

How to Keep Baby Spinach Fresh for Longer

baby spinach

These days, most baby greens come prepackaged and washed in those plastic clam shells at the supermarket. They are super convenient, but the greens seem to always spoil quickly. As it turns out there is a very easy fix for this.

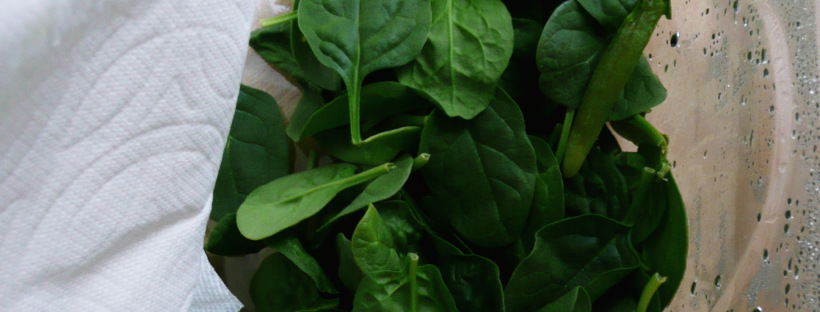
When you open the package, take 2-3 paper towels, fold them in half, and lay them on top of your greens before you close the lid and put them into the fridge. The paper towels absorb the excess moisture that can cause your greens to wilt more quickly. Every few days, check to see of the paper towels are damp. If they are, just replace them with new paper towels, and compost the used ones.

These baby spinach leaves really have been in my fridge for 2 weeks (that’s why the box is so empty, I’ve eaten most of it). This trick works great!

Different greens will have different shelf lives, even if you use this trick. Spring mix doesn’t last as long as the baby spinach does, but this will still work for that as well. This works very well for romaine lettuce, as it’s a sturdier lettuce.

I think that I’m going to post a new recipe every Saturday from now on. Occasionally I may write additional posts other days of the week. I have a number of tips for how to keep food fresh, and how to freeze foods that can spoil quickly, and I’m really excited to share those with you as well.

Please feel free to comment below, and let me know if this trick works for your lettuce too! I think that this must have saved me a small fortune (in baby greens) by now, and it feels great when you can make the most of the ingredients that you have.


Frozen Celery

What To Do With Leftover Celery

P1060566

I don’t often cook with a lot of celery, and I always seem to have some leftover this time of year after making stuffing and gravy.

Instead of letting it languish in the back of your fridge (until you have to throw it away) you can freeze it and use it in future dishes. There are just two things you need to remember with frozen celery.

1. Don’t let it defrost before cooking with it or it will brown. Add it straight from the freezer to the pan. It’s still edible when it turns brown, just not so pretty. If you need to dice the frozen celery further before cooking, try and do it quickly so that the celery doesn’t have time to defrost before it hits the pan.

2. You can use frozen celery in any recipe that calls for cooking celery, it’s not so great in recipes that call for raw celery (like potato salad) because frozen celery will lacks the color and crunch of fresh celery.
I’ve even used frozen celery to make dairy and gluten free clam chowder and it came out great.

You can also add some frozen celery to a pot with some diced onion, sliced carrot, leftover chicken, broth and cooked brown rice or gluten free noodles for a quick and tasty chicken soup. Its also great in minestrone or other vegetable soups.

Directions

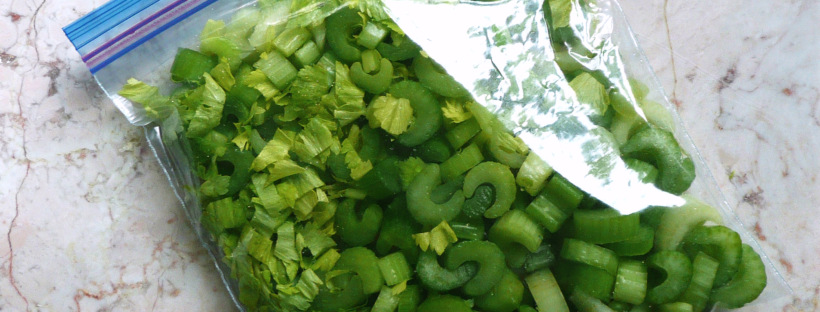
1. Wash and slice the celery into ½ inch thick slices. They look like beautiful little crescent moons this way, and the size makes it easy to add to recipes. I also love when little bits of chopped celery leaves peeking out of dishes because they make any dish a little prettier and cheerier.

2. Place the celery into a Ziploc bag and freeze flat.

When you want to use the celery, just break off as much celery as you need in the recipe and put the rest back into the freezer. Ta da! No more wasted celery!


roasted sweet potatoes

Roasted Sweet Potatoes

P1060409

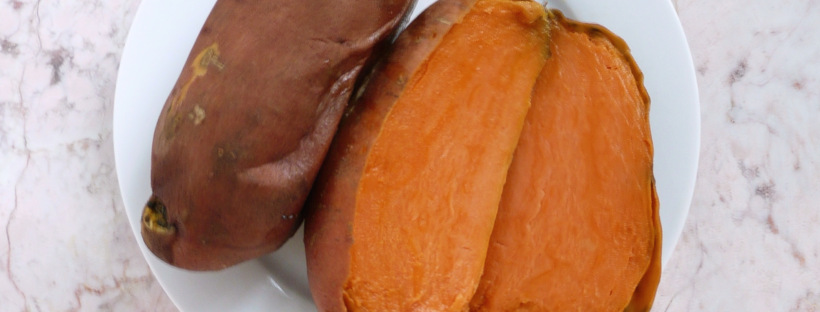
Roasted sweet potatoes are surprising versatile and super simple to make.
I roasted sweet potatoes a number of ways until I found Gwyneth Paltrow’s recipe for roasted sweet potatoes in her book It’s All Good.

This is a version of her recipe. I added the olive oil to crisp up the skin, and also put the sweet potatoes on a sheet pan (instead of roasting them directly on a baking rack) just for the sake of easy clean up.

I usually roast 4-5 of them at a time on a stainless steel baking sheet or a large glass pyrex dish, and they make a quick snack when I’m hungry but a little too tired to think to hard about what I want to eat. They usually get sweeter when they are refrigerated overnight. For a quick snack, I sprinkle them with a little cinnamon, and maybe a drizzle of little maple syrup if I’m craving something sweet

The cheapest place that I found organic sweet potatoes was at Costco (they don’t always have them) but you can get a 10 lb bag of them for around $11. Trader Joes almost always have them year round, and they are a little more expensive than Costco, but much cheaper than anywhere else.

You can puree them and use them to make my pumpkin tarts, mash them with some cinnamon and maple syrup, or add them to my vegan cheddar bay biscuits (recipe coming soon!).

Ingredients

4-5 sweet potatoes

½ – 1 tsp olive oil

Instructions

1. Preheat the oven to 425.

2. Give the sweet potatoes a good scrub. Pat them dry with a paper towel and prick them 4-5 times with a fork.

3. Rub the olive oil over the sweet potatoes, place them on a baking sheet or pyrex dish and roast for 1 hr.

4. If the sweet potatoes are thicker than 2 inches in diameter, cook them for an addition 15 -30 minutes until cooked through and you can pierce them with a paring knife with no resistance.

To clean up the caramelized/ blackened sweet potato goo, soak the pan or baking sheet overnight. Pour off the water and make paste from a little baking soda and dish soap. Use a scrubby sponge and baking soda paste to scrub off any of the remaining sweet potato goo.