hardboiled eggs banner

How to “Hard boil” Eggs in a Rice Cooker (Super Easy)

egg2

Hardboiled eggs are one of those things that are great to have stashed away in the fridge. They are perfect high protein snacks (they even have a built in wrapper!) and make a great breakfast on the go as well.

The not so nice part of hard-boiled eggs? The sitting / waiting for a large pot of water to boil.

As it turns out, cooking them in a rice cooker is much easier and faster too!

I first got the idea to do this when I saw an awesome post on the Digging Food blog about how to steam fresh eggs. I had no idea that you could steam eggs before I read their post.

After a little experimentation, I figured out how to make perfect “Hard-boiled” eggs in a rice cooker.

Let me walk you through how to make them…

Step 1 –  Place your desired number of eggs in a heat safe bowl (ceramic or metal is fine).

I use a Tatung 10-Cup Multifunctional Cooker (the most useful piece of cooking equipment known to man). It’s a great rice cooker / steamer, and when I was in college (and living in small dorm room) I managed to make 60 tamales from scratch in one.

Step 2 – Add water. I pour about 1/2 cup of water in the bottom of the cooker before adding a rack that looks like this (you can buy it pretty inexpensively in a larger Asian grocery store like 99 Ranch).

wire rack.jpg

Step 3 – Put the bowl on the rack (this ensures that your food won’t scorch on the bottom of your bowl).

egg1

Step 4 – Cover the rice cooker with the lid and turn the rice cooker on, then set your timer.

My rice cooker takes about 5 minutes until I start to see steam come out the sides of the lid. Your rice cooker make take more or less time to heat up, and it may take a little trial and error before you figure out the right amount of time to cook the eggs to your liking.

For my rice cooker (from the time you turn the rice cooker on to when you turn it off):

Soft Boiled –  takes 13 minutes

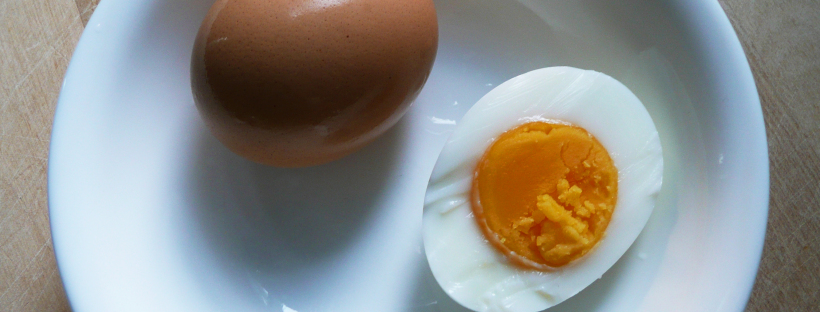
“7 Minute Egg”  (Like the one pictured) – takes 14 minutes

Hard-boiled – takes 20 minutes


Step 5 – Turn the rice cooker off.

Put on an oven mitt and transfer the eggs into an ice bath using tongs.

****Please be careful not to burn yourself **** The steam is pretty hot and you can use the lid of the pot to fan the steam away from you before you take the eggs out of the rice cooker.

egg3

Step 6 – Leave the eggs to rest in the ice bath for at least 30 minutes.

egg4

After this, the eggs should be pretty easy to peel. I like the keep them in the fridge unpeeled (I just like the ritual of peeling them right before I eat them) or you can peel the eggs and keep them in an airtight container in the fridge.

The most I’ve done at once is 4 eggs in one batch, and the cooking time doesn’t change if you cook 1-2 eggs or 4 at the same time.

Update – Jan 14, 2018 – I’ve found that it does make a difference what bowl you use to cook the eggs in. You want a sort of normal serving bowl and not something that’s super deep with high sides so that the steam can surround the eggs better. My preference these days is to cook 6 eggs at a time for 18 minutes (perfectly hard boiled , dunk them into ice water and then keep them in fridge for breakfast / snacking.

I hope that this helps make your breakfast / snacking / meal prep a little easier!

How do you like your eggs for breakfast?

– Elaine

banana bread muffins

Banana Bread Muffins – Gluten Free, Dairy Free, Refined Sugar Free, Comfort Baking

Banana Bread Muffins 1

There is something magical about making muffins. You sift together a few ingredients, stir in a few more, and a little while later 12 mini cakes emerge from the oven ready to fill your heart with joy and comfort.

If there is a practice more conducive to self care than baking, I have yet to discover it.

If I’m ever having a bad day, I bake. It takes focus and when you’re measuring and stirring everything together, the things that troubled you before seem far away.

The scent of delicious muffins wafts through the air and makes any house and home seem more warm and friendly. It’s a scent that makes the world a little softer and everything feel a little more possible.

And once you bite into a freshly baked muffin the spell is complete, and life feels ok again.

banana bread muffins 2

I love blueberry muffins, but there’s something about banana bread muffins that seem extra nourishing to your soul.

When I first cut gluten out of my diet, I really missed banana bread. I missed it’s buttery sweetness, and cozy banana richness.

It took me a couple of tries to get this recipe right, but these muffins taste just like the banana bread that I used to love eating. They also have a touch of cinnamon and vanilla to give them an extra bit of warmth to their flavor.

I like to use the ripest bananas that I can find (overripe bananas work the best as they are sweeter) and baking these muffins is a great way to cut down on food waste and have breakfast ready to go for the next few days (even if you eat 3 – 4 muffins still warm from the oven like I normally do).

I like to make these muffins a day ahead and leave them out on a plate on the counter covered by a paper towel. They dry out a little overnight, and the texture gets even better the next day.


Banana Bread Muffins

Makes 12 muffins


Ingredients

1 3/4 cups mashed ripe bananas (about 4 – 4 1/2 bananas)


2 tbsp apple cider vinegar

1/3 cup melted coconut oil

2 eggs

1/4 cup maple syrup

1 1/2 tsp vanilla extract


2 cups oat flour

level 3/4 tsp baking soda

1 tsp ground cinnamon


Notes –

* I grind oats into oat flour using a blender. Don’t grind the oats in a food processor because the flour won’t be fine enough.

Any extra oat flour I don’t use in the recipe goes into an airtight container and I use it for another recipe.

If you’re making this recipe for someone who has celiac disease, please use certified gluten free oats, as the oats from the bulk bins can sometimes be processed on the same equipment as wheat.


Instructions

1. Preheat the oven to 350F.

Grease and flour muffin pan with melted coconut oil and oat flour.

2. In a large bowl, sift together the oat flour, baking soda, and ground cinnamon and set aside.

3. In a separate bowl stir together the mashed bananas, apple cider vinegar, melted coconut oil, eggs, maple syrup, and vanilla extract until well combined.

Pour the wet mixture into the dry and stir until well combined. Divide the batter evenly between the 12 muffin cups and bake at 350 F for 33 minutes (until golden). Turn the oven down to 300 F and bake for another 10 minutes until the cake tester comes out clean.

Let the muffins cool in the pan. To pop them out of the muffin tin, run a small knife around the edge of each muffin (a small butter knife works great for this) and they should come right out.

banana bread muffins 3

I wish you many happy breakfasts (and memories) with these wonderful muffins.


Maple Vanilla Icing

Maple Vanilla Icing – Refined Sugar Free, Dairy Free, Vegan

P1080184

No gingerbread cookies or sugar cookies would be complete without icing! This is a super easy and allergy friendly icing for gingerbread cookies, and sugar cookies. Perfect for decorating cookies around the holidays!

Maple Vanilla Icing

Makes about 1/4 cup

Ingredients

3 tbsp + 2 tsp maple syrup

3 tbsp sweet rice flour (I used the Koda Farms Mochiko Sweet Rice Flour)

3 tbsp + ½ tsp melted refined coconut oil (I used one from Trader Joes)

¼ tsp + 1/8 tsp vanilla extract

tiny tiny pinch of salt

Instructions

1. Stir together the maple syrup, sweet rice flour, and vanilla extract until smooth.

2. Add in the melted refined coconut oil and stir until well combined.

3. Allow the icing to sit for a minute or two until the coconut oil cools a little and it’s easier to spread or pipe onto cookies.

To get a glossy finish on the cookies, ice the cookies while the icing is still warm, and use the back of a teaspoon smooth the icing to the edges of the cookie. If the icing firms up too much to frost with, just put the icing over a double boiler to gently melt the coconut oil and it will smooth right out again.

You can also use this icing to pipe with. I just scooped the icing in to a ziploc bag, cut off a tiny bit of the corner of the bag and used it to pipe the frosting onto the cookies.

If you want to pipe with the frosting, add in about 1/4 – 1/2 tsp more of the sweet rice flour to the frosting (to get a firmer frosting) and pipe the icing while the icing is still a warm.

If the icing gets firm to pipe with, scoop it out of the bag, heat it in a double boiler again, allow to cool for a minute and then scoop the icing back in to the bag, and pipe the icing as usual.

If it does look a little rough in places, you can dip your finger in some warm water and smooth down the rough edges, or use a wet toothpick for ever more precision in cleaning up the edges of your icing.


apple tarts

Apple Tarts – Dairy Free, Gluten Free, Vegan

P1060750-2

Happy Thanksgiving!

This is a bonus recipe, my gift to you for Thanksgiving! I hope that your family will enjoy them as much as my family does.

Apple tarts are full of fall flavors, and conjure up happy memories (or simply lovely daydreams) of wearing plaid (lots of plaid), and being bundled up in warm hats, scarves and mittens, and going to the local orchard for a fun day of apple pickin’ with friends and family.

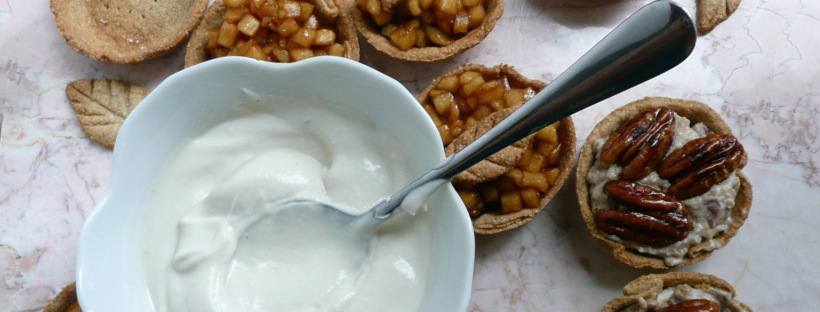
These tarts are simple to make, they just require about 35 minutes of your time, and a bit of stirring. I made up a batch of apple filling last night, and it’s just sitting in the fridge as we speak. I’ll spoon it into the tart crusts and top them with some cashew whipped cream right before serving.

You can easily double the batch to make the filling for 12 tarts, and I’ll leave the measurements for 12 tarts at the bottom of post, just in case you need them. You may have to slightly adjust the cooking times for the bigger batch.

Apple Tarts

Makes 6

Ingredients

2 Fuji Apples – cut into 1/4 inch dice (about 2 1/2 cups)

1/2 cup maple syrup

1 1/2 cups water


1/4 level tsp ground cinnamon

3/4 tsp vanilla extract

2 tsp avocado oil (or any neutral flavored oil)


Instructions

1. In a medium saucepan (if doubling the recipe, us a large pot instead) cook the apples, water and maple syrup over medium high heat for 20 minutes, stirring frequently.

Wear an oven mitt and a shirt with long sleeves to stir the mixture, as the steam from the cooking apples can be hot.

2. Turn the heat to medium, and cook for another 10 minutes stirring constantly.

Don’t touch the mixture with your hands during the final 10 minutes, or until it cools, as we’re basically making a caramel with apples in it. You don’t want to burn yourself from the hot sugar mixture.

The pieces of diced apple will become golden brown, and there shouldn’t be any more pools of liquid in the pan. The mixture will become more difficult to stir, and lots of tiny tiny bubbles will form on the bottom of the pan while you stir.

The mixture is done cooking when you can turn your spoon to the side and most of the apple mixture on the spoon will stick to the spoon instead of falling back into the pot.

3. Take the pan off the heat, and carefully scrape the mixture into a bowl and allow to cool.


P1060779

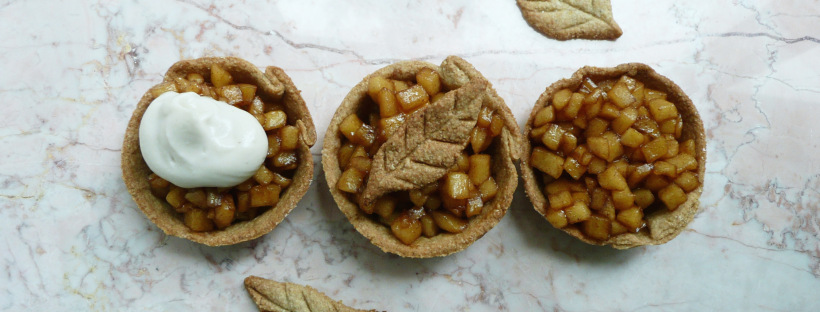
I kinda love how the middle tart almost looks like an apple pie version of a golden snitch. An apple tart with the wings of golden (gluten free) pie crust!

4. Add the cinnamon, vanilla extract, and oil to the cooled apple mixture and stir to combine. Spoon about 2 tbsp of the apple mixture onto each tart shell, and top with a dollop of cashew whipped cream. Serve immediately.


For 12 tarts

4 Fuji Apples – cut into 1/4 inch dice (about 5 cups)

1 cup maple syrup

3 cups water

1/2 level tsp ground cinnamon

1 1/2 tsp vanilla extract

4 tsp avocado oil (or any neutral flavored oil)


cornbread dressing - stuffing

Southern Style Cornbread Dressing – Gluten and Dairy Free Stuffing Recipe

P1060540- 2

There are many types of incredible stuffing, but Southern Style Cornbread Dressing is my absolute favorite. The taste of this brings back so many happy memories of friends and family over the years, and always brings a smile to my face. It’s slightly crispy on the top and moist and creamy in the middle, and it’s definitely a crowd-pleaser.

P1060543-2

You can either bake this in a muffin tin (will make 12 muffin size portions of stuffing) or bake it in a 13 x 9 casserole dish. The baking time will be the same either way. I would use the muffin pan if you’re planning on making the stuffing ahead or want to freeze individual portions to enjoy later.

Southern Style Cornbread Dressing – Gluten Free
Makes 4-6 servings

Adapted from this recipe.

For the Cornbread

Ingredients

¼ level cup + 1/3 level cup of oat flour*

1 level cup + 3 tbsp. of cornmeal **

¾ level tsp. baking soda

1 tbsp. ground flax seed (or add another ½ a beaten egg to the wet ingredients)

4.5 tbsp. avocado oil – or any neutral flavored oil

2 tbsp. apple cider vinegar (or white vinegar)

1 ½ tsp. maple syrup

1 cup of water

1 egg


Instructions

1. Preheat the oven to 425. Grease and flour a 8 x 8 baking dish with oat flour and any neutral flavored oil.

2. Sift the cornmeal, oat flour, baking soda, and ground flax seed in a large mixing bowl.

3. Stir together the wet ingredients until well combined. Add the wet into the dry and stir to combine. Pour into the 8×8 baking dish.

4. Bake at 425 for 30 minutes until golden brown. Set the cornbread aside to cool.

Notes – * I grind oats into oat flour using a blender. Don’t grind the oats in a food processor because the flour won’t be fine enough.

Any extra oat flour (or ground flax seed) I don’t use in the recipe goes into an airtight container and I use it for another recipe.

**If you’re allergic to corn, you could try substituting brown rice flour for the cornmeal at a 1:1 ratio. I didn’t test this recipe specifically with this substitution, so I’m not 100% sure this will work, but last year I made a cornbread dressing with brown rice flour instead of cornmeal and it came out great. You couldn’t tell the difference at all.


For the Cornbread Dressing

3 tbsp. olive oil

½ cup diced onion

¾ cup diced celery

1 egg

2 cups of chicken broth (homemade or store bought)

¾ tsp. pepper

¾ tsp. dried rubbed sage

¼ + 1/8 tsp. sea salt

Instructions

1. Sauté the diced onion and celery in the olive oil over medium heat until tender, about 12 minutes.

2. Add the sage and sauté 1 minute longer.

3. Crumble the cornbread into a large mixing bowl. Add the cooked vegetables, salt, pepper, sage and chicken broth to the mixture. Taste for seasoning, and add more salt and pepper if needed.

4. Stir in the beaten egg, then cover and chill the mixture overnight (at least 8 hours).

5. Preheat the oven to 375. Grease and flour your muffin tin or 13 x 9 baking dish with oil and oat flour. Pour the mixture into the pan and bake uncovered for 30-40 minutes until golden brown on top.

If your making this in a muffin pan, let the stuffing cool in the muffin pan for 30 -45 minutes so that the stuffing has some time to firm up and hold it’s shape. Run a butter knife around the edges to loosen them, pop the stuffing muffins out and refrigerate. Reheat them to serve.

If you’re putting a dish straight from the fridge into the oven, put the fridge-cold dish into the cold oven (so that the ceramic dish does shatter from the temperature change between the cold fridge and the hot oven). Then preheat your oven with the dish inside so that it warms up with the oven and bake as usual.

You can reheat any leftover stuffing by covering the dish tightly with foil, and baking at 300 degrees for 45 minutes until warmed through.

Cashew Whipped Cream

Cashew Whipped Cream – Dairy Free, Gluten Free, Vegan

P1060684-2.jpg

This cashew whipped cream is a great alternative to store bought whipped topping, and it’s super easy to make.

On it’s own, this cashew whipped cream isn’t super flavorful, but poured over a fresh summer peach it is absolutely spectacular, and it gives a wonderful creaminess when dolloped over mini pecan tarts, or pumpkin tarts at Thanksgiving.

Once it’s blended, you can add another tsp. of maple syrup, or a little more vanilla to taste, but the pie fillings will already be quite sweet, so try the cashew cream on a tart with some pie filing before adjusting the flavor of the cashew cream.

The oil may seem like a little bit of an odd addition, but it gives the cashew cream a little extra richness, and rounds out the flavor of the cashew whipped cream along with the sweetness of the maple syrup.

If you’re making a lot of tarts, you can easily double this recipe if need be. You can make this in advance and then keep it in an airtight container in the fridge until you’re ready to serve.

P1060787

Cashew Whipped Cream

Makes about ¾ cup.

Ingredients

½ tsp vanilla extract

1 tsp maple syrup

½ cup raw cashews (soaked overnight)

5 ½ tbsp. water

1 -1 ½ tsp avocado oil, or any neutral flavored oil (optional)


Instructions

1. Soak the cashews overnight, and drain. Add the cashews to a blender along with the rest of the ingredients and blend until smooth and creamy.

2. Spoon over fresh fruit or mini tarts. Serve.

Note – If you forget to soak the cashews, you can boil them for 50 minutes (it’s a long time I know, but they plump right up), adding water the pot occasionally if the water runs low. Drain them and allow them to cool to room temp before using

roasted sweet potatoes

Roasted Sweet Potatoes

P1060409

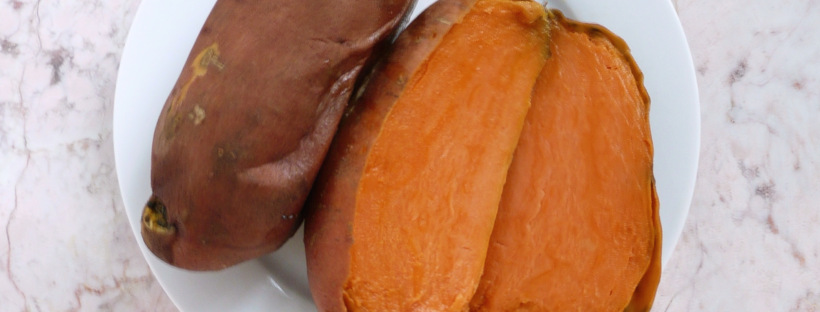
Roasted sweet potatoes are surprising versatile and super simple to make.

I roasted sweet potatoes a number of ways until I found Gwyneth Paltrow’s recipe for roasted sweet potatoes in her book It’s All Good.

This is a version of her recipe. I added the olive oil to crisp up the skin, and also put the sweet potatoes on a sheet pan (instead of roasting them directly on a baking rack) just for the sake of easy clean up.

I usually roast 4-5 of them at a time on a stainless steel baking sheet or a large glass pyrex dish, and they make a quick snack when I’m hungry but a little too tired to think to hard about what I want to eat. They usually get sweeter when they are refrigerated overnight. For a quick snack, I sprinkle them with a little cinnamon, and maybe a drizzle of little maple syrup if I’m craving something sweet

The cheapest place that I found organic sweet potatoes was at Costco (they don’t always have them) but you can get a 10 lb bag of them for around $11. Trader Joes almost always have them year round, and they are a little more expensive than Costco, but much cheaper than anywhere else.

You can puree them and use them to make my pumpkin tarts, mash them with some cinnamon and maple syrup, or add them to my vegan cheddar bay biscuits (recipe coming soon!).

Ingredients

4-5 sweet potatoes

½ – 1 tsp olive oil

Instructions

1. Preheat the oven to 425.

2. Give the sweet potatoes a good scrub. Pat them dry with a paper towel and prick them 4-5 times with a fork.

3. Rub the olive oil over the sweet potatoes, place them on a baking sheet or pyrex dish and roast for 1 hr.

4. If the sweet potatoes are thicker than 2 inches in diameter, cook them for an addition 15 -30 minutes until cooked through and you can pierce them with a paring knife with no resistance.

To clean up the caramelized/ blackened sweet potato goo, soak the pan or baking sheet overnight. Pour off the water and make paste from a little baking soda and dish soap. Use a scrubby sponge and baking soda paste to scrub off any of the remaining sweet potato goo.


muffin pan

The Best Way To Flour a Pan or Baking Dish, or an Ode to the Snap Mesh Tea Strainer

P1060532

I don’t use non-stick cookware or non-stick sprays, and learning to bake without those things can seem like a challenge.

But I’m here to tell you that it’s actually pretty easy! I use a stainless steel muffin pan and baking sheet, glass bakeware, or use a silpat. This is how I grease and flour my bakeware so that I can get my baked goods in an out of the pans easily.

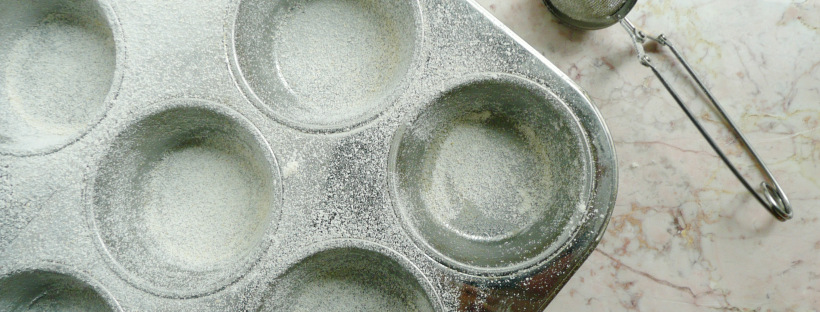
I used to find that I would waste at least a few tablespoons of extra oat flour when I needed to grease and flour a baking dish. Recently, I figured out that my snap mesh tea strainer was the perfect thing to dust oat flour over any baking dish.

Having a handle attached to what is essentially a very tiny flour sifter makes adding fairy light coatings of oat flour over baking dishes a breeze. You just flick your wrist a few times and like magic, your muffin pan is perfectly floured and you are ready to fill it with lovely muffin or cupcake batter.

And pretty soon the whole kitchen smells like heaven, there are freshly baked muffins and instantly it’s a fantastic day!

You can find snap mesh tea strainers online for about $5. I think that I got mine about 5 years ago from Whole Foods and it’s still going strong. They are pretty easy to care for, just make sure to hand wash and don’t let wet tea stay in them overnight to avoid rusting. I always snap them onto the lip of a jar or mug so that the two metal halves of the tea strainer get a chance to properly dry out.aa

Directions

1. To grease and oil a baking dish, I dip a corner of a folded paper towel into either some olive oil or a neutral flavored oil like avocado oil, and then rub the oiled bit of the paper towel over the surface of the baking dish.

2. Add some oat flour to one of the half spheres and close the tea strainer. Shake strainer to dust the oat flour over the surface of the oiled baking dish. If no more oat flour is coming out, then the little bits of oat flour left in the strainer are probably too large to make it through the fine mesh. Open the strainer, and pour out these larger bits of oat flour, and add more new oat flour to the tea strainer and resume dusting.

I also use this to whisk matcha tea. I don’t have a traditional bamboo matcha tea whisk, but I just put some powdered matcha tea into this tea strainer and then whisk it into some hot water and it works great. I don’t whisk until the tea is frothy, just until the tea is smooth and all of the matcha powder has worked its way through the fine mesh of the tea strainer.

This would make a great stocking stuffer for anyone who loves to bake. You’ll probably have to spend a minute explaining how amazing it is at dusting oat flour, or cocoa powder (if you’re making brownies) over bakeware, but once they try it, they’ll probably wonder how they ever greased and floured anything without it.