cole slaw tacos

Cole Slaw Dressing (Paleo, Refined Sugar Free, Soy Free)

cole slaw tacos

I love this creamy dressing. The dressing takes just minutes to put together and you can make it ahead of time as well and dress the cabbage and carrots when you’re ready to eat.

It’s slightly sweet from the maple syrup, and has a little bit of a bite from the apple cider vinegar and finely grated onion. And the dressing makes eating a good size serving of a cabbage (which is really good for you as it’s a cruciferous vegetable) a delicious experience.

When I first went gluten free, I experimented with a lot with different food combinations to try and come up with more exciting dishes to eat.

One of my first and favorite food combinations ones turned out to be chicken and cole slaw tacos.

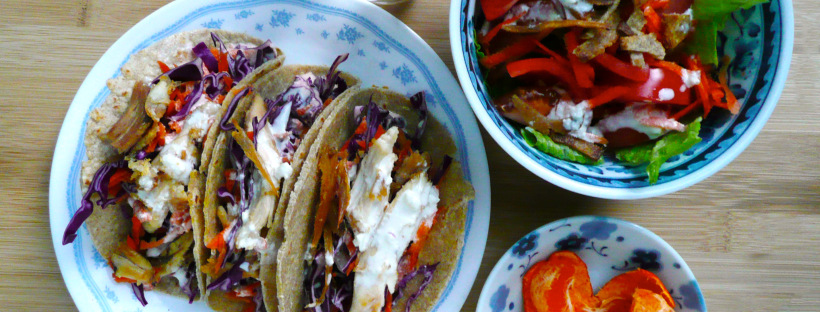
I use homemade gluten free tortillas, top them with cole slaw and some leftover roasted chicken. If you’re vegan, you can use a vegan mayo and a meatless chicken subsitute (or crispy tofu would be good too).

You can also serve the dressing over a normal salad (like I did in the picture). I trimmed off the edges of the tortillas and pan fried them with a little oil until they were crispy and added them to salad as a crouton substitute.

I hope that you enjoy the dressing (and that it makes eating lots of vegetables more exciting!).

Happy Eating!


Cole Slaw Dressing

Makes 1 serving

Ingredients

1/2 tbsp finely grated white onion (I use the really small holes on my box grater for this)

3 tbsp mayo (I used an avocado oil mayo)

3/4 tsp apple cider vinegar

1- 1 1/4 tsp maple syrup

pinch of salt (to taste)

1 cup finely shredded cabbage and grated carrot mix


Instructions

Stir together the onion, mayo, vinegar, and maple syrup. Add salt to taste.

Pour over the cabbage and carrots and stir until well mixed. Serve.

Instant Homemade Vegetable Stock

Instant Homemade Vegetable Stock Mix – Vegan, Soy-free, Gluten-Free

P1080022-2

Vegetable stock is easy to make, but can be a little bit of hassle, and takes up a lot of space in the freezer. Store bought veggie stock can be expensive, and it can have a lot of added ingredients that leave you wondering “What is organic caramel coloring?” and “Why does it need to be in vegetable stock?” I find myself asking the same questions when I read the back of soup bouillon labels as well.

If you too have these questions (and are wondering if there is an easier way to make vegetable stock with less additives) this might be the answer that you’ve been looking for.

This is a super simple and easy recipe to always have vegetable stock on hand. This recipe is soy free, thrifty and easy to customize.

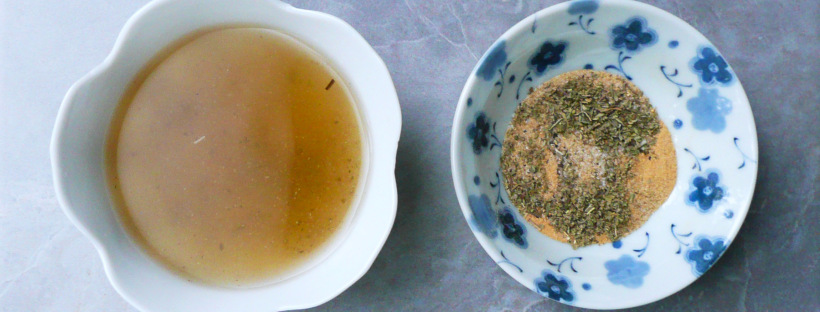
We’re going to basically make a spice mix that contains a lot of flavors that you would normally find in vegetable stock. You can almost think of it as a tea. Admittedly, it takes 10 minutes to steep (so not quite “instant”) but it’s still pretty quick.

You can also make a large batch of this veggie stock mix and put it into a little jar to use as needed.

If you don’t like the little bits of dried spices in your soup, you can strain the broth through a coffee filter, or place the spices in some layers of cheese cloth, tie it up with some kitchen twine and place it into your soup pot (basically like a tea bag) to fish out later once the flavors of the broth have infused.

I hope that this recipe helps you make lots of wonderful soups in the future. I plan on making a noodle soup with this pretty soon. Perfect for the cold weather.


Makes a scant 2 tbsp of veggie stock mix = 4 cups of vegetable stock

Ingredients

1 tsp granulated onion

3/4 tsp + 1/8 tsp celery salt

1/4 tsp + 1/8 tsp of granulated garlic

1/4 tsp dried rubbed sage

1/4 tsp dried parsley

1/4 – 1/2 tsp sea salt

1/8 tsp black pepper


Instructions

Stir all the spices together. Add the mixture to 4 cups of boiling water and allow to steep for 5-10 minutes. You can strain the mixture at this point or leave the spices in the stock depending on your preference.

Use in your favorite soup recipes, or add some noodles, and some veggies for a quick and filling lunch or dinner.

Enjoy!

baby spinach

How to Keep Baby Spinach Fresh for Longer

baby spinach

These days, most baby greens come prepackaged and washed in those plastic clam shells at the supermarket. They are super convenient, but the greens seem to always spoil quickly. As it turns out there is a very easy fix for this.

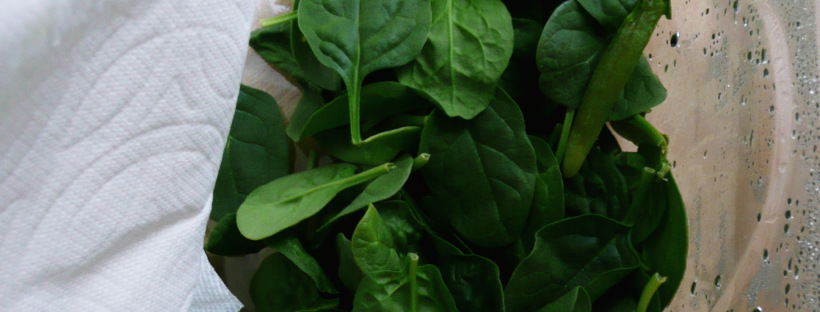
When you open the package, take 2-3 paper towels, fold them in half, and lay them on top of your greens before you close the lid and put them into the fridge. The paper towels absorb the excess moisture that can cause your greens to wilt more quickly. Every few days, check to see of the paper towels are damp. If they are, just replace them with new paper towels, and compost the used ones.

These baby spinach leaves really have been in my fridge for 2 weeks (that’s why the box is so empty, I’ve eaten most of it). This trick works great!

Different greens will have different shelf lives, even if you use this trick. Spring mix doesn’t last as long as the baby spinach does, but this will still work for that as well. This works very well for romaine lettuce, as it’s a sturdier lettuce.

I think that I’m going to post a new recipe every Saturday from now on. Occasionally I may write additional posts other days of the week. I have a number of tips for how to keep food fresh, and how to freeze foods that can spoil quickly, and I’m really excited to share those with you as well.

Please feel free to comment below, and let me know if this trick works for your lettuce too! I think that this must have saved me a small fortune (in baby greens) by now, and it feels great when you can make the most of the ingredients that you have.


Frozen Celery

What To Do With Leftover Celery

P1060566

I don’t often cook with a lot of celery, and I always seem to have some leftover this time of year after making stuffing and gravy.
Instead of letting it languish in the back of your fridge (until you have to throw it away) you can freeze it and use it in future dishes. There are just two things you need to remember with frozen celery.

1. Don’t let it defrost before cooking with it or it will brown. Add it straight from the freezer to the pan. It’s still edible when it turns brown, just not so pretty. If you need to dice the frozen celery further before cooking, try and do it quickly so that the celery doesn’t have time to defrost before it hits the pan.

2. You can use frozen celery in any recipe that calls for cooking celery, it’s not so great in recipes that call for raw celery (like potato salad) because frozen celery will lacks the color and crunch of fresh celery.
I’ve even used frozen celery to make dairy and gluten free clam chowder and it came out great.

You can also add some frozen celery to a pot with some diced onion, sliced carrot, leftover chicken, broth and cooked brown rice or gluten free noodles for a quick and tasty chicken soup. Its also great in minestrone or other vegetable soups.

Directions

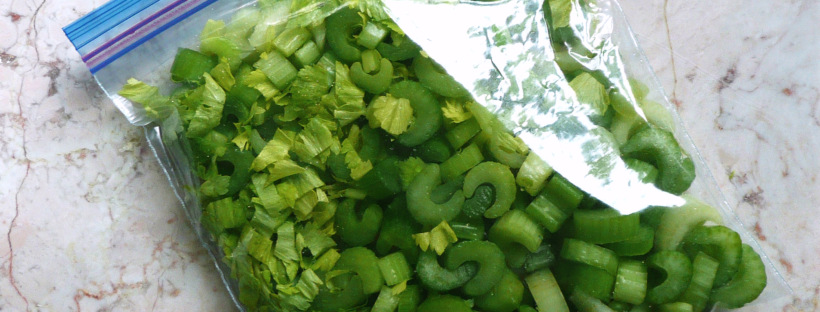
1. Wash and slice the celery into ½ inch thick slices. They look like beautiful little crescent moons this way, and the size makes it easy to add to recipes. I also love when little bits of chopped celery leaves peeking out of dishes because they make any dish a little prettier and cheerier.

2. Place the celery into a Ziploc bag and freeze flat.

When you want to use the celery, just break off as much celery as you need in the recipe and put the rest back into the freezer. Ta da! No more wasted celery!